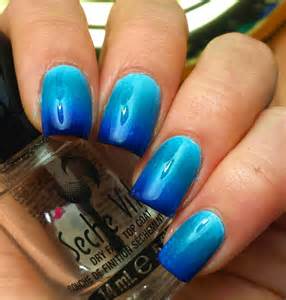
Get expert tips on nail gradient techniques including color palettes, nail prep, blending, and more for flawless nail art at home.
Choosing the Right Color Palette
When it comes to creating beautiful nail gradients, one of the most important aspects is choosing the right color palette. The colors you choose will determine the overall look and feel of your gradient, so it’s essential to make thoughtful selections. Consider using complementary colors for a striking contrast, or analogous colors for a more seamless transition. It’s also important to think about the opacities of your polishes, as well as the undertones of the colors. Taking the time to carefully select your colors will set the foundation for a flawless nail gradient.
Another consideration when choosing a color palette for your nail gradient is the season or occasion. For a fresh, springtime look, consider pastel shades or bright, cheerful colors. For a sophisticated, wintery gradient, opt for deep, rich tones. Think about the overall mood you want to convey with your nail gradient, and select colors that align with that aesthetic.
Lastly, don’t be afraid to experiment with different color combinations. Nail gradients are all about creativity and self-expression, so feel free to step outside your comfort zone and try new color pairings. You may be surprised by the stunning gradients you can create by mixing unexpected colors. Remember, the key to choosing the right color palette is to have fun and let your imagination run wild!
Prepping Your Nails
Before starting any nail art design, it is essential to properly prep your nails to ensure a smooth and long-lasting manicure. Begin by removing any old nail polish with an acetone-free remover to avoid drying out your nails. Once clean, trim and shape your nails to your desired length and style. Use a nail buffer to gently smooth the surface of your nails, creating a clean canvas for your chosen design.
After prepping your nails, it’s important to hydrate and protect them to prevent any damage. Apply a nourishing cuticle oil to soften and moisturize the skin around your nails, and then massage in a rich hand cream to keep your hands and nails hydrated. This step not only promotes healthy nails, but also helps your nail art last longer and look more professional.
Lastly, before applying any nail polish or nail art, make sure your nails are completely clean and dry. Use a cotton ball and nail polish remover to remove any excess oil or residue, and wait for a few minutes to ensure that your nails are fully dry. Prepping your nails in this way will help to create the perfect base for any nail gradient design, and ensure that your manicure looks flawless and lasts for days.
Using the Makeup Sponge Technique
When it comes to achieving a flawless and seamless nail gradient, the makeup sponge technique is a game-changer. This method allows for a smooth transition from one color to another, creating a stunning ombre effect on your nails. To begin, select two or more nail polish colors that you want to use for your gradient. Then, cut a small piece of a makeup sponge and apply a strip of each chosen nail polish color directly onto the sponge.
Next, gently dab the sponge onto your nails, starting from the base and working towards the tip. The porous texture of the sponge helps to blend the colors seamlessly, resulting in a beautiful gradient effect. Be sure to reapply the nail polish onto the sponge for each nail to ensure a consistent and professional finish. Once the gradient is applied, clean up any excess polish around the nails using a cleanup brush dipped in acetone.
After the gradient is complete, finish off with a top coat to seal in the colors and provide a glossy, long-lasting finish. By utilizing the makeup sponge technique, you’ll be able to achieve a stunning and flawless gradient on your nails, elevating your nail art game to the next level.
Creating a Smooth Blend
Creating a smooth blend on your nails can be a game-changer for your overall nail art look. Whether you’re going for a simple ombre effect or a more complex gradient, the key to achieving a flawless transition lies in the technique you use.
First and foremost, it’s important to prep your nails properly before starting the blending process. This means shaping and buffing your nails to create a smooth surface for the polish to adhere to. Additionally, applying a base coat can help the polish go on more evenly and prevents staining.
When it comes to actually creating the blend, using a makeup sponge technique can be incredibly effective. By dabbing different shades of polish onto a makeup sponge and pressing it gently onto your nails, you can achieve a seamless gradient that looks professional and polished.
Adding Glitter or Accents
The Art of Nail Gradient: Tips for a Flawless Transition
When it comes to creating a stunning nail gradient, adding glitter or accents can take your nail art to the next level. Whether you want to add a touch of sparkle or incorporate intricate designs, glitter and accents can enhance the overall look of your gradient. To ensure a flawless transition between colors, it’s important to carefully apply the glitter or accents in a way that complements the gradient.
One technique for adding glitter or accents to a nail gradient is to use a small detailing brush or a toothpick to carefully place the glitter or accents where you want them. This allows for precision and control, ensuring that the glitter or accents are applied exactly where you intend them to be. Additionally, using a clear nail polish as a base for the glitter or accents can help to secure them in place and prevent any smudging or clumping.
Another important tip for incorporating glitter or accents into a nail gradient is to consider the overall color scheme and theme of your design. Whether you choose to add a subtle hint of shimmer or go all out with bold accents, it’s essential to ensure that the glitter or accents complement the colors in your gradient and contribute to the overall cohesiveness of the nail art.
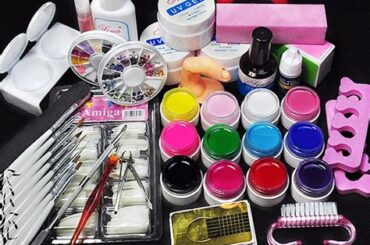
Using Nail Art Brushes
The use of nail art brushes can really take your nail gradient to the next level. By using the right brushes and techniques, you can create stunning and intricate designs that will make your nails stand out from the crowd.
When it comes to nail art, the brushes you use can make all the difference. Investing in high-quality nail art brushes will allow you to create fine lines, intricate details, and beautiful gradients with ease.
Whether you’re a beginner or an experienced nail artist, learning how to use nail art brushes effectively can help you achieve flawless and professional-looking results. With a bit of practice and the right tools, you can create stunning nail gradient designs that will impress everyone who sees them.
Cleaning Up the Edges
When it comes to creating a flawless nail gradient, cleaning up the edges is an essential step that can make a significant difference in the overall look of your manicure. After applying multiple layers of polish to achieve the perfect transition of colors, there may be some inevitable messiness around the edges of your nails. To ensure a professional and polished finish, cleaning up the edges is a crucial part of the process.
Start by dipping a small nail art brush or a q-tip into nail polish remover to remove any excess polish that has strayed onto the skin around your nails. Gently swipe the brush or q-tip around the edges in a careful and precise motion to clean up any mistakes or smudges. Be sure to take your time and work slowly to avoid smudging the gradient you’ve worked so hard to achieve.
Once you’ve cleaned up the edges and achieved the desired look, apply a top coat to seal in your gradient and add a protective layer to your manicure. This will help to prevent chipping and keep your nails looking fresh and vibrant for days to come. By following these simple yet crucial steps, you can ensure that your nail gradient looks flawless and professional every time.
Applying a Top Coat
Applying a Top Coat
Applying a top coat is the final step in achieving a flawless nail gradient. Once you have carefully blended your chosen colors, and created a smooth transition on your nails, it’s time to seal the look with a top coat. This not only adds a glossy finish to your nails, but also helps to protect the gradient design from chipping and fading.
When applying a top coat, it’s important to use a good quality product that dries quickly and evenly. This will ensure that your nail gradient remains pristine for as long as possible. Be sure to apply the top coat in thin, even layers to avoid any streaks or bubbles in the finish. Allow each layer to dry completely before applying the next, to achieve a smooth and flawless look.
Additionally, using a top coat with UV protection can help to prevent the colors in your gradient from fading or yellowing over time. This is particularly important if you have used vibrant or pastel shades in your design. By choosing a top coat with added UV protection, you can ensure that your nail gradient looks just as beautiful weeks after application as it did on day one.
Maintaining Your Nail Gradient
The Art of Nail Gradient: Tips for a Flawless Transition
After spending time and effort on creating a beautiful nail gradient, it’s important to know how to maintain it to preserve its flawless transition. One of the key tips for maintaining your nail gradient is to apply a protective top coat to seal in the colors and prevent chipping. This will not only prolong the longevity of your gradient but also add a glossy finish to your nails.
Additionally, it’s crucial to moisturize and hydrate your nails regularly to prevent them from becoming dry and brittle, which can cause the gradient to appear dull. Using a nourishing cuticle oil and hand cream will help keep your nails healthy and vibrant.
Lastly, it’s important to be gentle with your nails and avoid exposing them to harsh chemicals or rough activities that could damage the gradient. Wearing gloves when doing household chores or working with chemicals is a simple yet effective way to protect your nail gradient.
Frequently Asked Questions
What is nail gradient?
Nail gradient is a nail art technique where multiple nail polish colors blend seamlessly into each other, creating a gradient effect.
What tools do I need for nail gradient?
You will need at least two different nail polish colors, a makeup sponge, nail polish remover, and a top coat for a flawless nail gradient.
How do I achieve a flawless nail gradient?
Start by applying a base coat, then apply the nail polish colors onto a makeup sponge and dab onto your nails. Repeat until desired opacity is achieved. Clean up any excess and apply a top coat.
Can I use any color combination for nail gradient?
Yes, you can use any color combination for nail gradient. Experiment with your favorite colors or try complementary shades for a stunning effect.
How can I make my nail gradient last longer?
To make your nail gradient last longer, seal the design with a quality top coat and avoid exposing your nails to harsh chemicals and excessive water.
Are there any nail gradient tips for beginners?
For beginners, start with two contrasting colors for an easier gradient. Practice and patience are key to mastering the art of nail gradient.
Can I add embellishments to my nail gradient design?
Yes, after achieving a flawless nail gradient, you can add rhinestones, glitter, or nail stickers to enhance your design and make it even more stunning.


