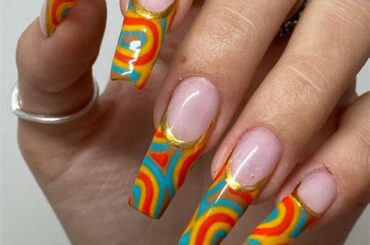
Do you love expressing your creativity through your manicure? If so, hand-painted nail designs are the perfect way to showcase your artistic flair. In this blog post, we’ll explore the fascinating world of hand-painted nail art, from the basics of choosing the right paints and brushes to mastering intricate techniques for creating stunning designs. Whether you’re a nail art novice or a seasoned pro, there’s something for everyone in this comprehensive guide. We’ll cover everything from floral and geometric patterns to lace and filigree designs, and even 3D embellishments. Get ready to elevate your nail game and learn how to create beautiful, one-of-a-kind designs that will impress everyone. Whether you’re looking to create festive holiday-themed nails or want to experiment with abstract and contemporary art, this blog post has got you covered. So, grab your paints and brushes, and let’s dive into the art of hand-painted nail designs!
Introduction to Hand-painted Nail Designs
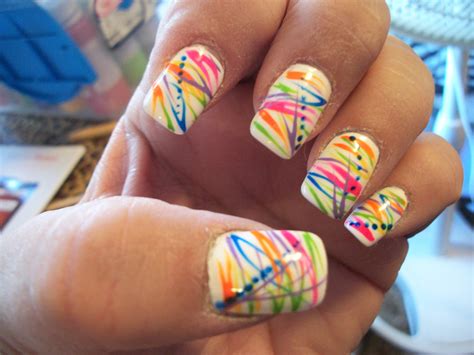
Hand-painted nail designs have become a popular trend in the world of nail art. This form of nail art involves the intricate and detailed painting of designs onto the nails, creating unique and personalized looks. Whether it’s floral patterns, geometric shapes, 3D effects, or festive-themed designs, hand-painted nail art allows for endless creativity and expression.
When it comes to hand-painted nail designs, the right nail paints and brushes play a crucial role in achieving the desired results. High-quality nail paints with good pigmentation and fine-tipped brushes are essential for precision and detail in hand-painted nail art. Choosing the right tools and materials is the first step in creating stunning hand-painted nail designs.
Nail preparation and care are also important aspects to consider before diving into hand-painted nail art. Proper nail care, including filing, buffing, and cuticle maintenance, provides a smooth and clean canvas for the designs. Additionally, the use of base coats and top coats helps to protect the nails and prolong the longevity of the hand-painted designs.
Basic techniques such as blending, shading, and detailing are fundamental skills in hand-painted nail art. These techniques allow nail artists to bring their designs to life, adding depth and dimension to the nail art. Understanding and mastering these basic techniques are key to creating professional-looking hand-painted nail designs.
Choosing the Right Nail Paints and Brushes
When it comes to creating beautiful hand-painted nail designs, choosing the right nail paints and brushes is crucial. The quality of your tools can make a significant difference in the final result of your nail art. So, how do you go about selecting the best nail paints and brushes for your designs?
First and foremost, it’s important to invest in high-quality nail paints that offer a smooth and even application. Look for formulas that are highly pigmented and have a smooth consistency, as these will make it easier to create intricate designs without streaking or clumping. Opt for a variety of colors, including essential shades like black, white, and nude, as well as a selection of vibrant hues and metallic finishes to give you options for different designs.
Equally important is finding the right nail brushes to bring your designs to life. Look for brushes that are specifically designed for nail art, with fine tips for precision and control. A set of brushes with various shapes and sizes will allow you to create a wide range of designs, from delicate details to bold lines and shapes. Additionally, consider the quality of the brush bristles, as soft and flexible bristles are essential for smooth and precise application.
Ultimately, choosing the right nail paints and brushes is essential for achieving professional-quality hand-painted nail designs. By investing in high-quality tools and building a diverse collection of colors and brushes, you’ll be well-equipped to bring your nail art visions to life.
Nail Preparation and Care
Before starting any hand-painted nail design, it’s essential to prepare and care for your nails properly. Nail preparation and care are crucial for achieving a flawless and long-lasting manicure. Firstly, it’s important to remove any old nail polish using an acetone-free nail polish remover to prevent drying out the nails. This will also help in getting a clean canvas for your hand-painted design.
Next, trim and shape your nails with a nail clipper and file. It is important to file the nails in one direction to prevent them from splitting. It’s also a good idea to push back the cuticles gently with a cuticle pusher to give the nail bed a clean and neat look.
After preparing your nails, it’s time to provide them with some care. Apply a moisturizing nail and cuticle oil to keep the nails and surrounding skin hydrated and healthy. Massaging the oil into the nails will improve blood circulation and promote nail growth. Regularly moisturizing and nourishing the nails will keep them strong and prevent breakage.
In addition to this, it’s important to take breaks from nail polish and let your nails breathe. This will prevent discoloration and any potential damage to the nails. Lastly, always use a base coat before applying any nail polish to protect the nails from staining and to improve the longevity of your hand-painted nail design.
Basic Techniques for Hand-painting Nail Designs
Hand-painting nail designs can be a fun and creative way to express yourself through your nails. Whether you’re a beginner or an experienced nail artist, mastering some basic techniques is essential for creating stunning hand-painted nail designs.
First and foremost, choosing the right nail paints is crucial. Opt for high-quality, pigmented nail paints that offer good coverage and are easy to work with. In addition, having a variety of brushes in different sizes and shapes is important for creating intricate designs.
Before you start painting, it’s essential to properly prepare your nails. This involves shaping and buffing your nails, pushing back your cuticles, and applying a base coat to ensure your design lasts longer.
When it comes to actually painting your nails, mastering techniques such as gradient and blending can take your designs to the next level. These techniques involve seamlessly blending different colors and creating smooth transitions for a more professional look.
Creating Floral Nail Designs
When it comes to creating floral nail designs, it’s important to start with a clean and well-prepped nail bed. Begin by shaping and buffing your nails to create a smooth canvas for your design. Once your nails are prepped, select a base color that will complement your floral design. Pastel shades like light pink, lavender, or mint green are popular choices for floral nail art.
After your base color has dried, you can begin creating your floral design using a thin nail art brush or dotting tool. Start by painting small flower petals in varying shades and sizes to create a realistic floral look. You can also incorporate leaves and stems to add depth and dimension to your design.
For a more intricate floral design, consider incorporating accent nails with a single large flower or multiple smaller blooms. This can create a beautiful focal point and add visual interest to your overall nail look.
Once your floral design is complete, finish with a clear top coat to seal in your design and add a glossy finish. This will not only protect your nail art but also give it a professional and long-lasting look. With practice and patience, you can create stunning floral nail designs that are perfect for any occasion.
Mastering Geometric Patterns on Nails
When it comes to nail art, geometric patterns are a popular choice for many people. There are so many different shapes and designs that can be created using this technique, and the results can be truly stunning. If you want to master the art of creating geometric patterns on nails, there are a few things you need to keep in mind.
First and foremost, you’ll need to have the right tools and materials. This includes a variety of nail paints in different colors, as well as a good set of brushes. Having the right tools will make it much easier to create clean, precise lines and shapes.
Next, it’s important to have a good understanding of basic nail preparation and care. This will ensure that your nails are in the best possible condition for creating intricate designs. Taking the time to properly prepare your nails will also help your designs to last longer without chipping or fading.
Once you have the right tools and your nails are prepped and ready to go, it’s time to start practicing some basic techniques for creating geometric patterns. Practice makes perfect, so don’t be discouraged if your first few attempts don’t turn out exactly as you’d hoped. With time and practice, you’ll be able to create beautiful, intricate geometric patterns on your nails.
Intricate Lace and Filigree Nail Art
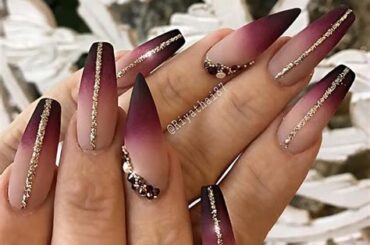
When it comes to nail art, intricate lace and filigree designs are a great way to add a touch of elegance and femininity to your nails. These delicate and detailed designs are perfect for special occasions or if you just want to add a little glamour to your everyday look.
One of the most important aspects of creating intricate lace and filigree nail art is choosing the right tools and materials. You’ll need a fine nail art brush, a steady hand, and some patience to achieve the intricate detailing required for this style of nail art.
Before you start painting, it’s important to prepare your nails by filing and shaping them to your desired length and shape. You’ll also want to apply a base coat to protect your natural nails and provide a smooth surface for your design.
Once your nails are prepped and ready, you can start creating your lace and filigree designs using a combination of nail polish and nail art brushes. You can use a single color for a classic look, or get creative with multiple shades to add dimension and depth to your designs.
Embellishing Nails with 3D Effects
Embellishing your nails with 3D effects is a fun and creative way to take your nail art to the next level. Adding dimension to your nails can make your designs stand out and look more professional. There are various techniques you can use to achieve 3D nail art, from using acrylic or gel to creating intricate designs with nail jewels and charms.
One popular method for creating 3D effects is using acrylic powder. You can mix the acrylic powder with a liquid monomer to create a moldable paste that can be shaped and molded into various designs. Once the acrylic has dried, you can paint over it with nail polish to enhance the 3D effect. This method allows for endless creativity and flexibility in design.
Another way to add dimension to your nails is by using nail jewels and charms. These small, decorative elements can be easily attached to the nail with nail glue or gel, creating a three-dimensional look. You can choose from a wide variety of nail jewels and charms, including rhinestones, studs, pearls, and more, to create unique and eye-catching designs.
In addition to acrylic powder and nail jewels, you can also experiment with 3D nail stickers. These pre-made stickers are designed to add dimension to your nails without the need for any special tools or skills. Simply apply the sticker to your nail and seal it with a top coat for a quick and easy 3D effect.
Designing Festive and Holiday-themed Nails
When it comes to the holiday season, everyone loves to add a little festive touch to their outfits, and what better way to do so than with holiday-themed nail art? Designing festive and holiday-themed nails can be a fun and creative way to get into the holiday spirit and show off your holiday cheer. Whether it’s Christmas, New Year’s, Halloween, or any other special occasion, there are endless possibilities for creating unique and eye-catching nail designs that are perfect for the holiday season.
One of the most popular holiday-themed nail designs is the classic Christmas manicure, featuring iconic symbols like candy canes, snowflakes, Christmas trees, and Santa hats. These designs can be created using nail paints in traditional holiday colors like red, green, gold, and silver, and can be enhanced with glitter, gems, and other festive embellishments to really make them stand out.
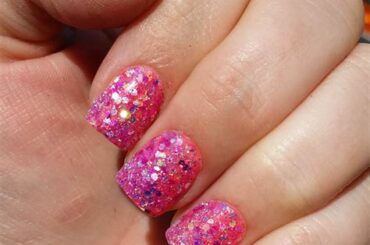
For New Year’s Eve, sparkly and glamorous nail designs are a must. Think metallic shades, glitter gradients, and plenty of shimmer and shine to ring in the new year in style. Whether you’re going for a bold and festive look or something more understated and elegant, there are endless options for creating the perfect New Year’s manicure that will have you shining bright all night long.
And let’s not forget about Halloween! From spooky haunted houses and eerie ghosts to cute and quirky jack-o-lanterns and candy corn, there are tons of fun and unique designs to choose from for Halloween-themed nail art. Black, orange, purple, and green are popular colors for Halloween nails, and can be used to create everything from simple and spooky to intricate and detailed designs that are sure to impress.
Creating Abstract and Contemporary Nail Art
When it comes to nail art, abstract and contemporary designs offer a unique and artistic approach to expressing your individual style. These designs often incorporate bold colors, unconventional shapes, and creative patterns, making them a popular choice for those looking to make a statement with their nails.
One of the key elements of creating abstract and contemporary nail art is the use of bold and vibrant nail paints. These colors are often used to create eye-catching designs that stand out from traditional nail art. It’s important to choose high-quality nail paints that offer a smooth and even application, as this will ensure that your designs look professional and polished.
In addition to bold colors, the use of geometric shapes is also a common feature in abstract and contemporary nail art. From simple lines and dots to intricate patterns and asymmetrical designs, geometric shapes can add a modern and edgy touch to your nail art. Using fine-tipped nail brushes and precision tools can help you create crisp and clean lines for a professional finish.
Another technique commonly used in abstract and contemporary nail art is the layering of colors and textures. By combining different nail paints, finishes, and embellishments, you can create multi-dimensional and visually interesting designs that are sure to turn heads. Experimenting with various techniques such as sponging, marbling, and gradient effects can help you achieve a unique and personalized look.

