Gather the necessary nail art tools
Gather the necessary nail art tools is the first step towards creating beautiful and unique nail designs. Having the right tools will not only make the process easier but also help you achieve professional-looking results. Whether you are a beginner or an experienced nail artist, having a well-stocked nail art kit is essential. Here are some of the must-have tools that every nail enthusiast should have:
1. Nail Polish: Start by collecting a wide range of nail polish colors. Having a good selection of colors will allow you to create various designs and experiment with different trends. From bold and vibrant shades to subtle and pastel hues, having a diverse collection of nail polishes will give you endless possibilities.
2. Nail Art Brushes: Invest in a set of high-quality nail art brushes. These brushes come in various shapes and sizes, allowing you to create intricate designs and details on your nails. Make sure to have a fine liner brush for delicate lines, a flat brush for larger strokes, and a dotting tool for creating dots and patterns.
3. Nail Stamping Kit: Nail stamping kits are a fantastic tool for quickly and effortlessly transferring intricate designs onto your nails. These kits usually include stamping plates with different patterns, a stamping tool, and a scraper. With a stamping kit, you can achieve professional-looking designs without any artistic skills.
4. Nail File and Buffer: A nail file and buffer are essential for shaping and smoothing your nails. Get a few different types, such as a coarse file for shaping, a fine file for smoothing, and a buffer for adding shine to your nails. Using these tools properly will ensure that your nails have a perfect canvas for your nail art.
5. Nail Rhinestones and Studs: Adding some bling to your nail designs is always a fun option. Collect various sizes and colors of nail rhinestones and studs to add dimension and sparkle to your creations. These can be easily applied using nail glue or a top coat.
6. Nail Striping Tape: Nail striping tape is a thin adhesive tape that can be used to create straight lines and geometric patterns on your nails. It’s a great tool for achieving precise and clean designs. Simply apply the tape to your nails, paint over it, and remove the tape to reveal perfect lines.
| Must-Have Nail Art Tools: | |
|---|---|
| Nail Polish | A wide range of colors |
| Nail Art Brushes | Various shapes and sizes |
| Nail Stamping Kit | Stamping plates, stamping tool, and scraper |
| Nail File and Buffer | Coarse file, fine file, and buffer |
| Nail Rhinestones and Studs | Various sizes and colors |
| Nail Striping Tape | Thin adhesive tape for creating straight lines |
Having these essential nail art tools in your collection will enable you to unleash your creativity and experiment with different techniques. Remember, practice makes perfect, so don’t be afraid to try new designs and have fun with your nail art journey!
Prepare your nails
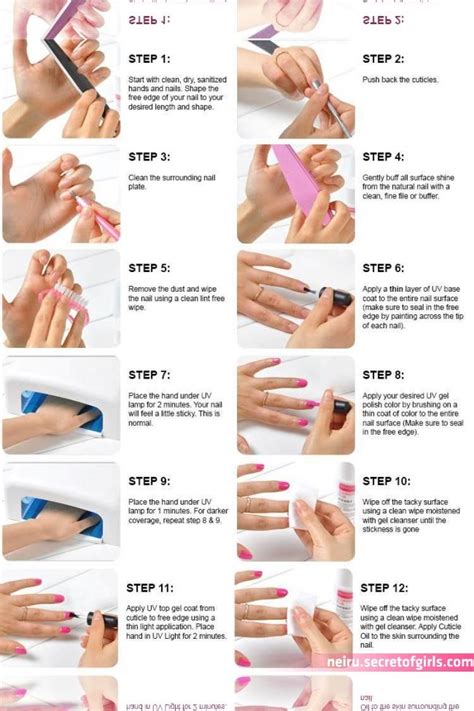
Preparing your nails before applying any nail art is an essential step to ensure the longevity and quality of your design. By following a few simple steps, you can create the perfect canvas for your nail art masterpiece.
First and foremost, it is important to remove any existing nail polish. Use a non-acetone nail polish remover to gently wipe away the old polish, ensuring that your nails are clean and free from any residue.
Next, you should trim and shape your nails to your desired length and style. Whether you prefer short and neat nails or long and glamorous ones, make sure to use a nail clipper and a file to achieve the desired shape. Remember to file in one direction to prevent any damage or splitting of your nails.
After shaping, it’s time to take care of your cuticles. Apply a small amount of cuticle oil or lotion to your nail beds and gently push back the cuticles using a cuticle pusher or an orangewood stick. This step not only improves the appearance of your nails but also promotes healthy nail growth.
Once your nails are trimmed, shaped, and cuticles taken care of, it’s time to buff and smooth the nail surface. Use a nail buffer or a four-sided nail file to gently buff the tops of your nails. This helps in removing any ridges or imperfections, creating a smooth and even surface for the nail polish.
Lastly, clean your nails and hands thoroughly to remove any dust or oils. You can use warm water and a mild soap or a nail polish remover to ensure that your nails and surrounding skin are completely clean and ready for your chosen nail art design.
By following these simple steps to prepare your nails, you are setting the stage for a beautiful and long-lasting nail art design. Remember to take your time and pay attention to details, as proper nail preparation is key to achieving stunning nail art results.
Choose a base color and apply it
When it comes to nail art, choosing the right base color is essential. The base color sets the foundation for your entire nail design and can greatly impact the overall look. Whether you prefer a classic nude, a bold red, or a trendy pastel, the base color you choose should complement your skin tone and personal style. Here are some tips to help you choose a base color and apply it flawlessly.
1. Consider your skin tone: When selecting a base color, it’s important to consider your skin tone. Fair skin tones tend to look great with light or pastel shades, while medium skin tones can pull off a wide range of colors. If you have a dark skin tone, rich and vibrant hues will beautifully contrast and enhance your nails.
2. Match it with your outfit: Another way to choose a base color is by considering the outfit you plan to wear. If you’re going for a monochromatic look, opt for a color that complements your clothing. For a pop of color, choose a shade that contrasts with your outfit. You can even match your nails to an accent color in your ensemble for a cohesive and stylish look.
3. Apply it evenly: Once you’ve chosen your base color, it’s time to apply it to your nails. Start by properly preparing your nails by removing any existing nail polish and shaping them. Apply a thin layer of base coat to protect your nails and create a smooth surface. Then, carefully apply your chosen color in thin, even coats. Allow each coat to dry before applying the next to avoid streaks or smudging.
- Start with a clean canvas: Remove any old polish and shape your nails.
- Apply a base coat: Protect your nails and create a smooth surface.
- Apply thin, even coats: Build up the color gradually to avoid streaks.
- Allow each coat to dry: Patience is key for a flawless finish.
4. Experiment with nail art: Once your base color is dry, you can get creative and experiment with various nail art techniques. From simple geometric shapes to intricate designs, there are endless possibilities to explore. Consider using nail stencils, striping tapes, or even freehand painting to add unique patterns and details to your nails.
| Tip | Trick | Technique |
|---|---|---|
| Use a dotting tool for precision | Create an ombre effect with a sponge | Try negative space nail art |
| Experiment with different textures | Add glitter for a touch of sparkle | Layer different colors for dimension |
5. Seal it with a top coat: To ensure your nail art design lasts and stays intact, apply a high-quality top coat. A top coat not only adds shine and glossiness to your nails but also acts as a protective barrier. This will help prevent chipping and extend the longevity of your nail design.
By carefully choosing a base color and applying it with precision, you can create a stunning canvas for your nail art designs. So go ahead, express your creativity, and have fun experimenting with different colors and techniques!
Experiment with nail art techniques
Experimenting with different nail art techniques can add a unique touch to your manicure and express your personal style. By exploring various techniques, you can create stunning nail designs that are sure to grab attention. Whether you’re a beginner or a seasoned nail artist, trying out new techniques can be both fun and challenging. In this blog post, we will explore some popular nail art techniques that you can experiment with to elevate your nail game.
List of Nail Art Techniques:
- Water Marble
- Stamping
- Gradient
- Dotting
- Striping
- Freehand Design
- Foil
One of the most popular nail art techniques is water marble. This technique involves creating patterns on the surface of water and transferring them onto your nails. By using different colors and swirling them together, you can achieve mesmerizing marble-like designs that are unique to each nail. It requires some practice to perfect, but the end result is worth the effort.
Stamping is another technique that allows you to create intricate designs on your nails with ease. This technique involves using a stamping plate, nail polish, and a stamper to transfer pre-designed patterns onto your nails. With countless stamping plates available in various designs, you can unleash your creativity and experiment with different combinations to create stunning nail art.
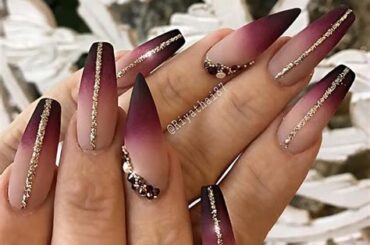
Gradient nail art is a technique that involves blending two or more colors seamlessly on your nails. By using a sponge or a brush, you can create a smooth transition of colors from one shade to another. This technique offers endless possibilities; you can opt for a subtle gradient or go bold with vibrant colors.
Get creative with dotting, a technique that involves using a dotting tool or a bobby pin to create patterns and designs on your nails. From simple polka dots to intricate floral designs, dotting allows you to experiment with different sizes and shapes to achieve your desired look. It’s a versatile technique that can be easily mastered by beginners.
Striping is a nail art technique that involves using striping tape or a thin brush to create clean, straight lines on your nails. This technique is perfect for those who prefer a sleek and minimalist nail look. With striping tape, you can create geometric patterns, stripes, or even negative space designs.
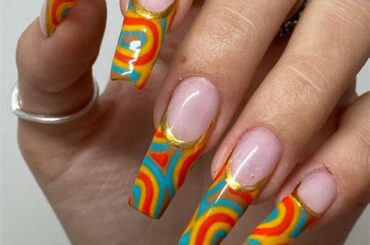
If you have steady hands and an artistic flair, try your hand at freehand design. This technique allows you to unleash your creativity and paint intricate designs directly onto your nails using a fine brush or a nail art pen. From floral motifs to abstract art, the possibilities are endless.
Foil nail art is a technique that involves applying metallic or holographic foils onto your nails to create a shiny and eye-catching design. By using foil adhesive and gently pressing the foil onto your nails, you can achieve stunning and unique effects. Experiment with different colors and patterns to create a foil design that reflects your personal style.
Remember, the key to experimenting with nail art techniques is to have fun and let your creativity flow. Don’t be afraid to try new things and mix different techniques to create your own signature nail designs. With practice and patience, you’ll be able to master these techniques and showcase stunning nail art that will make heads turn.
Add intricate designs and details
When it comes to nail art, adding intricate designs and details can take your manicure to the next level. Whether you prefer minimalist nail art or more elaborate designs, there are countless options to choose from. Not only does adding intricate designs and details allow for creativity and self-expression, but it also adds a unique and personal touch to your nails. In this blog post, we will explore different techniques and tips to help you add intricate designs and details to your nails.
One of the first steps in adding intricate designs and details to your nails is to gather the necessary nail art tools. These tools may include a dotting tool, thin nail art brushes, nail stencils, and nail art stickers. Having these tools on hand will make it easier to create precise and detailed designs on your nails.
Once you have your tools ready, it’s time to prepare your nails for the intricate designs. Start by filing and shaping your nails to your desired length and shape. Next, apply a base coat to protect your nails and create a smooth surface for the nail art. This will help ensure that your designs adhere properly and last longer.
- Choose a base color and apply it
- Experiment with nail art techniques
- Apply top coat for a glossy finish
- Tips for maintaining your nail designs
Now comes the fun part – adding intricate designs and details to your nails. There are various techniques you can try, such as freehand painting, stamping, water marbling, and using nail stencils. You can create floral patterns, geometric designs, or even intricate landscapes – the options are endless. Don’t be afraid to get creative and experiment with different colors, textures, and shapes.
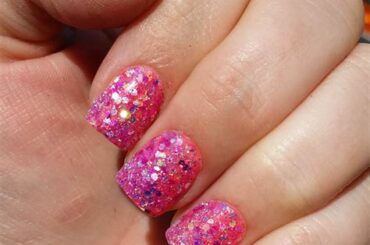
When adding intricate designs and details to your nails, attention to detail is key. Use thin nail art brushes or dotting tools to create intricate lines, dots, or small accents. You can also add glitter, gems, or rhinestones to enhance the overall look of your nail art. The key is to be patient and take your time to ensure precision and neatness.
Once you’re satisfied with your nail design, it’s important to apply a top coat to seal and protect the design. This will not only give your nails a glossy finish but also help prevent chipping and ensure the longevity of your nail art. Remember to let your nails dry completely before applying the top coat to avoid smudging or ruining your hard work.
To maintain your intricate nail designs, it’s essential to take proper care of your nails. Avoid harsh chemicals, such as acetone or bleach, as they can fade or damage the design. Wearing gloves when doing household chores or activities that may expose your nails to harsh conditions can also help preserve your intricate nail art.
In conclusion, adding intricate designs and details to your nails is a great way to showcase your artistic side and add a unique touch to your manicure. With the right tools, techniques, and a little patience, you can create stunning nail art that will impress everyone. So go ahead, unleash your creativity, and have fun experimenting with intricate designs and details on your nails!
Apply top coat for a glossy finish
The final step in creating a stunning nail design is to apply a top coat for a glossy finish. This step not only adds shine and luster to your nails but also helps seal and protect your nail art. There are several reasons why applying a top coat is crucial to completing your nail look.
First and foremost, a top coat acts as a protective barrier, shielding your nail design from everyday wear and tear. It helps prevent chipping, scratching, and fading, ensuring that your manicure lasts longer. By adding an extra layer of protection, you can enjoy your beautiful nail art for days or even weeks without worrying about it getting damaged.
In addition to its protective properties, a top coat also enhances the overall appearance of your nail design. It adds a beautiful shine that instantly makes your nails look more polished and professional. Whether you have a simple design or complex artwork, applying a glossy top coat elevates the look and gives it a high-end salon finish.
When choosing a top coat, it’s important to opt for a quality product that dries quickly and doesn’t smudge your nail art. Look for top coats that are specifically formulated for nail designs and mention a high gloss finish. Additionally, consider using a top coat that offers added benefits, such as UV protection or chip-resistant properties, for long-lasting wear.
To apply the top coat, start by ensuring that your nail art is completely dry. Wait for each layer of polish and design to dry thoroughly before proceeding. Once your nails are ready, apply a thin and even layer of top coat over the entire nail surface. Be careful not to apply too much product, as it may cause smudging or pooling. Allow the top coat to dry completely before touching or applying any additional products.
In conclusion, applying a top coat is an essential step to achieve a glossy finish and prolong the life of your nail designs. Not only does it protect your nails from everyday damage, but it also adds a beautiful shine that enhances the overall look. Remember to choose a quality top coat and apply it correctly for the best results. With a glossy top coat, your nail designs will truly shine and make a lasting impression.
Tips for maintaining your nail designs
Maintaining your nail designs is just as important as creating them. After spending time and effort on perfecting your nail art, you want to make sure it lasts as long as possible. Here are some useful tips to help you maintain your nail designs:
- Avoid using your nails as tools: Your beautifully designed nails may tempt you to use them for everyday tasks, but resist the urge! Using your nails as tools can chip or break them, ruining your nail art.
- Wear gloves for household chores: When doing household chores, especially ones involving cleaning agents or harsh chemicals, it’s best to protect your nails by wearing gloves. This will prevent your nail designs from getting damaged or discolored.
- Apply a clear top coat regularly: A clear top coat acts as a protective layer for your nail designs. Reapplying it every few days will help extend the life of your nail art and keep it looking fresh and vibrant.
- Moisturize your cuticles: Dry, brittle cuticles can take away from the overall look of your nail designs. Keep them moisturized by applying cuticle oil or a moisturizing cream on a regular basis. Well-nourished cuticles will make your nail art stand out.
- Avoid prolonged exposure to water: While it’s important to keep your nails clean, prolonged exposure to water, like soaking in the bath or swimming for extended periods, can weaken nail polish and cause it to peel or chip. Try to minimize the time your nails spend in water.
- Be gentle with your nails: Avoid picking or peeling at your nail art. If you have any loose edges or chips, use a nail file to smooth them out instead of picking at them. Being gentle with your nails will help maintain the integrity of your designs.
- Protect your nails from extreme temperatures: Extreme heat or cold can cause nail polish to crack or bubble. Try to protect your nails from extreme temperatures by using gloves or mittens when necessary.
By following these tips, you can enjoy your meticulously designed nail art for longer periods of time. Remember, proper maintenance is key to keeping your nail designs looking stunning and fabulous!
Frequently Asked Questions
1. What are the necessary nail art tools I need?
To create beautiful nail art designs, you will need tools such as a nail file, cuticle pusher, nail polish remover, base coat, nail polish, nail art brushes, dotting tools, and a top coat. These tools will help you achieve professional-looking results.
2. How should I prepare my nails before applying nail art?
Before starting your nail art, it’s crucial to prepare your nails. Start by removing any existing nail polish, shaping your nails with a file, and pushing back your cuticles gently using a cuticle pusher. This will ensure a clean and smooth surface for your nail art.
3. How do I choose a base color for my nail art?
Choosing the right base color is essential for enhancing your nail art design. Consider your personal style, the occasion, and your outfit when selecting a base color. You can opt for a neutral shade for a classic look or go bold with vibrant colors for a statement design.
4. What are some popular nail art techniques to try?
There are various nail art techniques you can experiment with, such as ombre, water marble, stamping, gradient, and freehand designs. Each technique offers a unique and creative way to decorate your nails. Feel free to explore and find the technique that suits your preferences.
5. How can I add intricate designs and details to my nail art?
To add intricate designs and details to your nail art, you can use nail art brushes, dotting tools, and nail stencils. Nail art brushes are perfect for creating fine lines, while dotting tools allow you to easily create dots and patterns. Stencils can help you achieve complex designs with precision.
6. Why is applying a top coat important for nail art?
Applying a top coat is crucial for securing and protecting your nail art design. It helps seal in the design, prevents chipping and peeling, and provides a glossy finish to enhance the overall look of your nail art. A top coat also ensures longevity, allowing you to enjoy your art for an extended period.
7. Any tips for maintaining my nail art designs?
To maintain your nail art designs, you can gently file any minor chips or snags that may occur. Additionally, regularly applying a clear top coat over your nail art can help prolong its lifespan. Remember to always protect your nails with gloves when performing tasks that may cause damage or wear to your design.


