Are you tired of your at-home manicures never turning out quite as perfect as you’d like? Don’t worry, we’ve got you covered! In this blog post, we will be sharing ten nail polish hacks that every girl should know for achieving flawless manicures. From choosing the right nail polish shade to increasing the longevity of your manicure, we’ve got tips and tricks that will take your at-home manicures to the next level. Whether you’re a nail polish pro or a beginner, these hacks will help you achieve salon-like results without breaking the bank. So grab your favorite nail polish shades and let’s dive into the world of perfect manicures!
Choosing the right nail polish shade
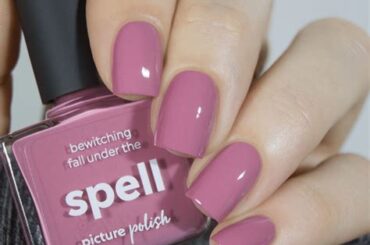
When it comes to choosing the right nail polish shade, it’s important to consider not only your personal style, but also the occasion for which you’ll be wearing the polish. If you’re looking for something simple and classic, a nude or light pink shade might be the perfect option. However, if you want to make a statement, bold and bright colors can help you stand out.
Another factor to consider when choosing a nail polish shade is your skin tone. Certain colors might complement your skin tone better than others, so it’s worth experimenting with different shades to find what works best for you. For example, if you have fair skin, pastel shades may be more flattering, while dark skin tones can often pull off deeper, richer hues.
It’s also important to think about the season when selecting a nail polish shade. Light, airy colors are perfect for spring and summer, while deep, moody tones can be more suitable for fall and winter. Of course, there are no hard and fast rules, so feel free to wear whatever colors make you feel confident and beautiful.
Ultimately, the most important thing to consider when choosing a nail polish shade is your own personal preference. Whether you prefer subtle, understated shades or eye-catching, dramatic colors, the most important thing is that you feel good about your manicure. Don’t be afraid to experiment and have fun with different shades to find what works best for you.
Prepping your nails for a perfect manicure
Before you start painting your nails, it’s important to properly prep them to ensure a flawless manicure. The first step is to remove any old nail polish that may be lingering on your nails. Make sure to use an acetone-free nail polish remover to prevent your nails from drying out.
Next, you’ll want to shape your nails to your desired length and style. Use a nail file to gently shape the edges and smooth out any rough surfaces. Be sure to file in one direction to prevent nail breakage.
After you’ve shaped your nails, it’s time to push back your cuticles. Soak your fingertips in warm, soapy water for a few minutes to soften the cuticles, then gently push them back using a cuticle pusher or orange stick. This will create a clean canvas for your manicure.
Finally, give your nails a quick wash to remove any remaining oils or debris. This will help the nail polish adhere better and last longer. Now that your nails are prepped and ready, you can move on to the fun part – choosing your nail polish color and giving yourself a perfect manicure!
Creating flawless nail polish application
When it comes to nail polish application, achieving a flawless finish is the ultimate goal. To begin, start by ensuring that your nails are clean and free from any old polish. Use a gentle nail polish remover to wipe away any remnants of previous polish, as this will create a smooth base for your new application.
Next, take the time to trim and shape your nails to your desired length and style. This step is crucial in creating a polished look, as neat and well-groomed nails will provide a better canvas for your chosen nail polish shade.
Before applying any polish, use a base coat to protect your nails and prevent staining. This step also helps the polish adhere better, resulting in a longer-lasting manicure. After the base coat has dried, apply your chosen nail polish shade in thin, even layers. Avoid applying thick coats, as this can lead to uneven drying and potential smudging.
To finish off, seal in your nail polish application with a high-quality top coat to add shine and prolong the life of your manicure. By following these steps and taking your time, you can achieve a flawless nail polish application that will last for days to come.
Fixing smudged nail polish in seconds
It’s happened to all of us – you spend time painting your nails, only to accidentally smudge the polish before it’s fully dried. But fear not, there are quick and easy ways to fix smudged nail polish in just a few seconds.
If you notice a smudge on your nail, don’t panic. Take a clean angled makeup brush dipped in polish remover and gently smooth out the smudge. Be sure to apply light pressure and work in small, quick strokes to avoid spreading the smudge even further.
Another quick fix is to use a nail art brush dipped in nail polish remover to gently dab over the smudged area. The secret is to work quickly before the polish fully dries so that it can be easily blended back into place.
For extra insurance against smudges, consider using a quick-dry top coat to seal in your nail polish. This will not only help your manicure dry faster, but will also protect against minor smudges and dings.
Achieving a salon-like glossy finish
When it comes to achieving a salon-like glossy finish on your nails, there are a few key steps to keep in mind. First and foremost, it’s important to start with clean, well-prepped nails. This means removing any old nail polish and gently pushing back your cuticles to create a smooth canvas for your manicure.
Next, choose a high-quality nail polish that is known for its glossy finish. Look for polishes that specifically advertise a shiny, high-gloss formula to ensure that your nails will have that coveted salon look. Additionally, consider using a top coat specifically designed to enhance shine and prolong the life of your manicure.
Once you’ve applied your nail polish and top coat, be sure to allow ample time for the layers to dry completely. Rushing this step can result in smudges or smears that will detract from the glossy finish you’re aiming for. Consider using a quick-dry top coat to speed up the drying process without sacrificing shine.
Finally, take steps to protect your manicure and prevent chipping or dulling of the glossy finish. This includes being mindful of activities that could damage your nails, such as repetitive hand washing or exposure to harsh chemicals. By taking these precautions, you can enjoy a salon-like glossy finish for days to come.
Making your nail polish dry faster
Are you tired of waiting for your nail polish to dry? We’ve all been there – watching the clock and trying not to smudge our freshly painted nails. But fear not, there are a few tips and tricks you can use to make your nail polish dry faster.
One method is to use a quick-drying top coat. There are plenty of products on the market specifically designed to speed up the drying process. These top coats usually contain ingredients that help evaporate the solvent in the nail polish, leaving the color to dry quickly. Look for a top coat labeled as quick-dry or fast-drying for best results.
If you’re in a hurry, you can also try using a fan to help your nail polish dry faster. Simply place your hands in front of a fan and the air circulation will expedite the evaporation process. This is a quick and easy way to speed up the drying time, especially if you’re short on time.
Another trick is to dip your freshly painted nails in a bowl of ice water. The cold temperature helps set the polish and can make it dry faster. It may sound unconventional, but many people swear by this method for achieving dry nails in no time.
Removing glitter nail polish without a hassle
Glitter nail polish is a fun and glamorous way to add some pizzazz to your nails, but it can be a real pain to remove. The tiny sparkles and particles can get stuck to your nails, making it difficult to completely clean off. However, there are a few tips and tricks you can use to remove glitter nail polish without the hassle.
One method is to use the foil method. Soak a cotton ball in nail polish remover, place it on the nail, and wrap each finger in aluminum foil. Let it sit for about 5-10 minutes, then firmly press down on the nail and twist the foil to remove the glitter polish. This helps to loosen the glitter and make it easier to wipe off.
Another hack is to try using a peel-off base coat before applying the glitter nail polish. This creates a barrier between the glitter and your natural nail, making it easier to peel off the polish in one go without leaving behind any residue.
For stubborn glitter particles that just won’t budge, you can use a small brush dipped in nail polish remover to gently scrub away the remaining glitter. Be sure to moisturize your nails and cuticles after using this method, as the nail polish remover can be drying.
Reviving dried-out nail polish
Have you ever reached for your favorite nail polish only to find that it has dried out and become unusable? It can be frustrating to see a perfectly good bottle of polish go to waste, but don’t worry, there are some simple tricks to revive dried-out nail polish.
If your nail polish has started to thicken and become difficult to apply, try adding a few drops of nail polish thinner to the bottle. Nail polish thinner is specifically designed to restore the consistency of thickened nail polish, making it easier to apply to your nails.
Another method to revive dried-out nail polish is to place the bottle in a bowl of warm water for a few minutes. The heat will help to loosen up the dried polish and make it easier to mix back to a smooth consistency. After warming the polish, give the bottle a good shake to ensure that the color is evenly distributed.
If your nail polish has separated and the color has settled at the bottom of the bottle, simply roll the bottle between your hands to mix the polish back together. This will help to blend the pigments and restore the color to its original state.
Preventing nail polish stains on your skin
One of the biggest challenges with painting your nails at home is preventing nail polish stains on your skin. It happens to the best of us – one wrong move with the brush and suddenly your fingers are stained with bright red or deep blue polish. But fear not, there are a few tricks you can use to avoid this common manicure mishap.
First, it’s important to take your time and apply the nail polish carefully. Use a small amount of polish on the brush and start in the center of your nail, then work your way to the sides. This will help prevent excess polish from getting on your skin.
Another tip is to use a barrier around your nails to protect your skin. You can use a product specifically designed for this purpose, or simply apply a thin layer of Vaseline or lotion around the edges of your nails. This will create a barrier that makes it easier to clean up any mistakes.
Finally, if you do accidentally get nail polish on your skin, don’t panic. Wait for the polish to dry completely, then use a cotton swab dipped in nail polish remover to gently clean up the edges. Be careful not to smudge the polish on your nails while doing this.
Increasing the longevity of your manicure
One of the biggest frustrations for anyone who loves a fresh manicure is when it starts to chip within days of application. However, there are several tips and tricks you can use to help increase the longevity of your manicure.
First and foremost, it’s essential to start with a clean nail bed. Use a gentle nail polish remover to effectively remove any oils or residues from your nails before applying a base coat. This will ensure that your nail polish adheres to your nails properly, preventing premature chipping.
Additionally, applying a high-quality base coat can make a world of difference. Look for a base coat that is specifically formulated to grip onto your nail polish and create a smooth, even surface. This will help your nail polish adhere better and last longer.
Another key factor in increasing the longevity of your manicure is to apply thin, even coats of nail polish. Thin layers of nail polish are less likely to chip and are more flexible, making them less prone to cracking. It may be tempting to apply thick coats for quick coverage, but taking the time to apply thin layers will ultimately lead to a longer-lasting manicure.


