Introduction: The Rising Trend of 3D Nail Art
Over the past few years, there has been a significant rise in the popularity of 3D nail art. Gone are the days when a simple coat of nail polish was enough to make a statement. Today, more and more people are opting for intricate designs and eye-catching embellishments to adorn their nails. From celebrities to fashion enthusiasts, everyone seems to be jumping on the 3D nail art bandwagon. But what exactly is this trend all about?
3D nail art involves the use of various three-dimensional elements to create visually stunning nail designs. These elements can include rhinestones, pearls, studs, beads, flowers, bows, and even small charms. They are carefully applied to the nails, either individually or in combination, to create unique and personalized designs. The result is a striking and eye-catching manicure that is sure to turn heads.
One of the reasons behind the rising popularity of 3D nail art is its versatility. With a wide range of elements and design options to choose from, you can easily create a look that suits your style and personality. Whether you prefer a simple and understated design or a bold and edgy one, there are endless possibilities to explore. Additionally, 3D nail art allows for intricate details and designs that are not possible with regular nail polish alone.
Another factor contributing to the growing trend of 3D nail art is the increasing accessibility of these elements. In the past, getting your hands on 3D nail art supplies may have been a challenge, limited to professional salons or niche stores. However, with the rise of online shopping and the availability of affordable options, it is now easier than ever to experiment with 3D nail art at home. This has opened up a whole new world of creativity and self-expression for nail enthusiasts everywhere.
In conclusion, the rising trend of 3D nail art has taken the world of manicures by storm. This unique and artistic form of nail design offers a limitless range of possibilities and allows individuals to showcase their creativity and personality through their nails. Whether you choose to try it out yourself or opt for a professional application, 3D nail art is a trend that is here to stay.
Choosing the Right 3D Elements for Your Manicure
When it comes to enhancing your manicure with 3D elements, the possibilities are endless. From delicate flowers to dazzling crystals, there are a plethora of options to choose from. However, selecting the right elements is crucial in achieving a cohesive and eye-catching look. In this blog post, we will guide you through the process of choosing the perfect 3D elements for your manicure.
First and foremost, consider the theme or style you want to portray with your manicure. Are you going for a romantic and feminine look, or do you prefer something edgier and bolder? This will help you narrow down your choices and ensure that the elements you choose align with the overall aesthetic you are aiming for. Keywords: theme, style, romantic, feminine, edgier, bolder
Next, think about the size and shape of the 3D elements. If you have shorter nails, it’s best to opt for smaller elements that won’t overwhelm your nail bed. On the other hand, if you have longer nails, you can experiment with larger elements to create a more dramatic effect. Additionally, consider the shape of your nails. Certain elements, such as studs or charms, may work better on square or almond-shaped nails, while others, like flowers or bows, can complement round or oval-shaped nails. Keywords: size, shape, shorter nails, longer nails, square, almond-shaped, round, oval-shaped
Lastly, take into account the practicality of the elements you choose. While intricate and delicate designs may look stunning, they can be more prone to chipping or snagging on clothes. If you lead an active lifestyle or work in an environment that puts stress on your nails, it may be wise to opt for more durable elements, such as studs or metal accents. On the other hand, if you have a special occasion or event coming up, you can go all out with delicate elements that are meant to be admired for a shorter period of time. Keywords: practicality, intricate, delicate, chipping, snagging, active lifestyle, durable, studs, metal accents, special occasion
DIY vs Professional Application: Pros and Cons
When it comes to getting a trendy and eye-catching manicure, there are two main options: DIY (Do It Yourself) or professional application. Both methods have their own pros and cons, so it’s important to weigh them before making a decision. In this blog post, we will explore the pros and cons of both DIY and professional application of 3D nail art.
List of Pros and Cons for DIY Application:
- Pros: One of the biggest advantages of DIY application is the cost. It is generally more affordable to purchase 3D nail elements and accessories and apply them yourself at home rather than visiting a professional nail salon.
- Cons: However, DIY application requires a certain level of skill and practice. It may take time and patience to master the art of applying 3D nail elements seamlessly. It is also important to note that DIY application may not provide the same level of precision and durability as a professional application.
List of Pros and Cons for Professional Application:
- Pros: Professional nail technicians are trained and experienced in applying 3D nail art. They have the skills to create intricate designs and ensure long-lasting results. Additionally, visiting a salon can offer a relaxing and pampering experience.
- Cons: The main drawback of professional application is the cost. Getting your nails done at a salon can be quite expensive, especially if you opt for intricate and elaborate 3D designs. Furthermore, you may need to schedule appointments in advance and adhere to salon timings.
In conclusion, whether you choose to DIY or go for professional application of 3D nail art, it ultimately depends on your budget, skill level, and desired results. DIY application is a more cost-effective option, but it requires practice and may not provide the same level of precision. Professional application, on the other hand, offers expert skills and a luxurious experience, but at a higher cost. Consider these pros and cons before making your decision and enjoy flaunting your stylish 3D nail designs!
Prepping Your Nails for 3D Design
Nail art has become increasingly popular in recent years, with 3D designs taking center stage. These eye-catching and creative designs can add a unique touch to any manicure, but prepping your nails properly is essential for a successful 3D design. The right preparation ensures that your nails are ready to withstand the weight and structure of the 3D elements and helps to prolong the lifespan of your nail art.
One of the first steps in preparing your nails for a 3D design is ensuring that they are clean and free of any oil or residue. This can be achieved by using a gentle nail polish remover to eliminate any existing polish or oils. Afterward, wash your hands thoroughly with soap and water to remove any remaining residue and to ensure that your nails are completely clean.
Once your nails are clean, it’s time to trim and shape them to your desired length and style. Use a nail clipper to trim any excess length, and then file the edges to smooth them out. This step is important as it provides a clean canvas for your 3D nail design and helps to prevent any snagging or chipping.
After trimming and shaping your nails, it’s crucial to take care of your cuticles. Gently push back your cuticles using a cuticle pusher or a wooden stick wrapped in cotton. Avoid cutting your cuticles as this can lead to infections and damage to your nails. Applying cuticle oil or a moisturizing cream can help to keep your cuticles healthy and nourished.
Now that your nails are prepped and ready, it’s time to apply a base coat. A base coat not only helps to prevent staining of your natural nails but also provides more adhesion for the 3D elements. Apply a thin, even layer of base coat to each nail, making sure to cover the entire surface. Allow the base coat to dry completely before moving on to the next step.
Prepping your nails for 3D design is an essential step to achieve stunning and long-lasting nail art. By following these simple steps – cleaning your nails, trimming and shaping them, taking care of your cuticles, and applying a base coat – you can ensure that your nails are ready to showcase your creative 3D designs. So go ahead, prep your nails, and let your imagination run wild!
Step-by-Step Guide to Applying 3D Elements
3D nail art has become a popular trend in the world of manicures, allowing individuals to add unique and eye-catching designs to their nails. If you’re interested in trying out this artistic technique yourself, this step-by-step guide will walk you through the process of applying 3D elements to your nails.
Before diving into the application process, it’s important to gather all the necessary materials. You’ll need nail polish, a base coat and top coat, 3D nail art elements such as studs, jewels, or decals, tweezers for placement, and a clear gel or acrylic to secure the 3D elements.
Now that you have everything you need, follow these steps:
- Clean and prep your nails by removing any old polish and shaping them to your desired length and style.
- Apply a thin layer of the base coat to protect your natural nails and allow it to dry completely.
- Select the 3D elements you want to use and plan out the design on a flat surface.
- Apply a layer of colored nail polish as the background for your design and let it dry.
- Using tweezers, carefully pick up the 3D element and apply a small amount of clear gel or acrylic to the back.
- Place the element onto your nail and gently press it down to secure it in place. Repeat this step for each element.
- Once all the elements are in place, apply a top coat over your entire nail to seal and protect the design.
- Allow your nails to dry completely before doing any activities that may cause damage.
With these simple steps, you can easily create stunning 3D nail art designs. Remember to take your time and be patient during the application process to achieve the desired results. Experiment with different colors, shapes, and textures to create unique designs that showcase your personal style.
Tips and Tricks for Long-lasting 3D Nail Designs
The key to achieving long-lasting 3D nail designs lies not only in the application but also in the aftercare. With proper care and attention, you can enjoy your stunning 3D designs for weeks on end. Here are some tips and tricks to ensure your nail art withstands the test of time:
1. Choose Quality Products: When it comes to 3D nail designs, using high-quality products is crucial. Invest in reputable brands that offer durable and long-lasting supplies, such as high-quality gel polishes and acrylics. These products are specifically formulated to adhere well and have better longevity.
2. Proper Base Coat: Before applying any 3D elements, make sure to apply a strong base coat. This provides a smooth surface for the designs to adhere to and helps prevent chipping and lifting. Use a base coat that is designed to bond well with your natural nails or enhancements.
3. Secure with Gel Top Coat: After placing your 3D elements and allowing them to dry, seal them in with a gel top coat. Gel top coats are known for their durability and provide a protective barrier against everyday wear and tear. Apply a thin layer, making sure to cap the edges for added strength.
4. Avoid Excessive Water Exposure: Water can be the enemy of 3D nail designs. While it’s important to practice good hygiene, excessive exposure to water can cause your designs to loosen or even fall off. Wear gloves when doing dishes or cleaning, and avoid soaking your nails for prolonged periods.
5. Be Gentle with Your Hands: Being mindful of your hands’ activities can help prolong the lifespan of your 3D designs. Avoid using your nails as tools to open packages or scrape off labels. Treat your nails with care, and they’ll reward you with long-lasting beauty.
6. Regular Maintenance: As your natural nails grow, the gap between the 3D designs and your cuticles may become more noticeable. To maintain a polished look, schedule regular maintenance appointments with a professional nail technician. They can fill any gaps and ensure your designs stay intact.
7. Apply Cuticle Oil: Keeping your cuticles moisturized is essential for healthy nails and maintaining the longevity of your 3D designs. Apply cuticle oil regularly to nourish the skin around your nails and prevent them from becoming dry and brittle.
By following these tips and tricks, you can enjoy the beauty and longevity of your 3D nail designs. Remember, extra care and attention go a long way in maintaining stunning nails that will turn heads wherever you go!
Exploring Creative Ways to Incorporate 3D Elements
When it comes to nail art, the possibilities are endless. One trend that has been gaining popularity is 3D nail art. Gone are the days of simple, one-dimensional designs. Now, nail artists are taking things to the next level by incorporating three-dimensional elements into their manicures. The result? Eye-catching and jaw-dropping nail designs that are sure to turn heads.
So, how exactly can you incorporate 3D elements into your nail designs? Well, the possibilities are truly endless. One creative way to incorporate these elements is by adding small 3D embellishments that match the overall theme of your design. For example, if you’re going for a floral theme, you could add small 3D flowers or leaves to your nails. These tiny elements are not only cute but also add depth and dimension to your manicure.
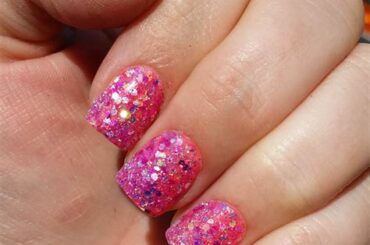
Another way to incorporate 3D elements is by using textured nail polishes. These polishes have a unique formula that creates a textured finish on your nails, giving them a three-dimensional look. You can choose from a variety of textures, such as glitter, sugar, or caviar. These textured polishes can be used alone for a simple yet stunning design or can be combined with other elements for a more intricate look.
- Choose small 3D embellishments that match your design.
- Use textured nail polishes for a three-dimensional look.
- Combine different elements to create a unique and eye-catching design.
| Pros | Cons |
|---|---|
| Enhances the overall look of your nails. | Requires more time and effort to apply. |
| Adds depth and dimension to your manicure. | May be more expensive than traditional nail art. |
| Allows for endless creative possibilities. | Requires proper maintenance for long-lasting results. |
Overall, exploring creative ways to incorporate 3D elements into your nail designs can take your manicures to a whole new level. Whether you choose to use small 3D embellishments or textured nail polishes, the key is to have fun and experiment with different techniques and designs. So go ahead, get creative, and embrace the three-dimensional world of nail art!
Frequently Asked Questions
Q: How do I choose the right 3D elements for my manicure?
A: When choosing 3D elements for your manicure, consider your personal style, the occasion, and the overall look you want to achieve. Look for elements that complement your nail shape and size, and consider experimenting with different textures, colors, and designs.
Q: What are the pros and cons of DIY application for 3D nail art?
A: DIY application allows you to be creative and save money, but it requires time, practice, and the right tools. It may also be challenging to achieve professional-looking results, especially for elaborate designs. Professional application, on the other hand, ensures expert execution but can be more costly.
Q: How should I prep my nails before applying 3D designs?
A: Prepping your nails properly is crucial for long-lasting 3D designs. Start by shaping and filing your nails, then gently push back your cuticles. Cleanse your nails with nail polish remover to remove any oils or residue. Apply a base coat to create a smooth surface and strengthen your nails.
Q: Can you provide a step-by-step guide for applying 3D elements?
A: Sure! Firstly, apply a base coat and let it dry. Then, select your desired 3D elements and apply a small amount of nail glue onto them. Carefully place the elements onto your nails, pressing them down gently to ensure secure adhesion. Finish with a top coat to seal the design and give it a glossy finish.
Q: How can I make my 3D nail designs last longer?
A: To make your 3D nail designs last longer, avoid exposing your nails to excessive moisture and avoid using your nails as tools. It’s also helpful to apply a top coat every few days to protect the design and prevent chipping. Gently moisturize your cuticles and nails daily to keep them healthy.
Q: What are some creative ways to incorporate 3D elements into nail designs?
A: You can get creative with 3D elements by combining them with other nail art techniques, such as ombre, gradients, or negative space. Try using a mix of different elements like rhinestones, beads, or charms. You can also experiment with placing the elements strategically to create unique patterns or designs.
Q: Where can I find the best quality 3D nail art supplies?
A: The best quality 3D nail art supplies can be found at reputable beauty supply stores, online retailers specializing in nail art, or professional nail salons. Look for brands that offer a wide range of options and have positive customer reviews to ensure you’re getting high-quality products.

