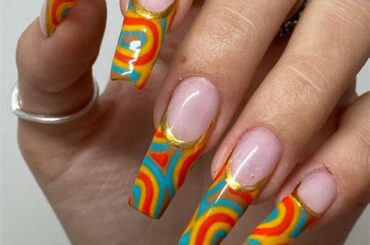
Choosing the Right Nail Shape
Choosing the right nail shape is crucial in achieving the perfect manicure. Whether you prefer short and simple nails or long and dramatic ones, finding the shape that suits you best can make all the difference. Different nail shapes can accentuate certain features of your hands and fingers, creating a flattering and stylish look. In this blog post, we will explore the different nail shapes available and how to choose the right one for you.
When it comes to nail shapes, there are several options to consider. The most common nail shapes include square, round, oval, almond, and stiletto. Each shape has its own unique characteristics and can create a different visual effect. For those with wider nail beds, a square shape can help make the nails appear slimmer. On the other hand, round and oval shapes are great for those with shorter nails and want a more natural look.
Another factor to consider when choosing the right nail shape is your lifestyle and personal preferences. If you lead an active lifestyle or work with your hands often, you may want to opt for a shorter and more practical nail shape, such as square or round. On the other hand, if you love the look of long and glamorous nails, almond and stiletto shapes can add a touch of elegance to your style.
- Square: This shape is characterized by straight sides and a flat top, creating a modern and edgy look.
- Round: With soft edges and a curved shape, round nails offer a classic and timeless appearance.
- Oval: Oval nails are a combination of square and round shapes, creating an elongated and feminine look.
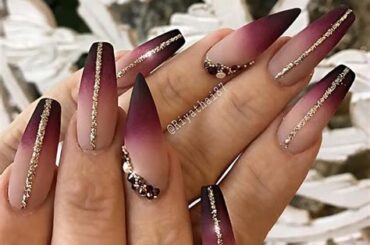
- Almond: Almond nails have a tapered tip, resembling the shape of an almond. They can make fingers appear longer and more slender.
- Stiletto: Known for their sharp and pointed tips, stiletto nails are dramatic and daring, perfect for making a bold fashion statement.
Ultimately, choosing the right nail shape is a personal decision that should be based on your style, preferences, and lifestyle. Experimenting with different shapes can be a fun way to express your creativity and enhance your overall look. Whether you prefer a classic round shape or want to try something more adventurous like stiletto nails, the key is to find a shape that makes you feel confident and beautiful.
Optimal Length for Different Nail Designs
When it comes to nail designs, one important factor to consider is the optimal length for different styles. The length of your nails can greatly impact the overall look and feel of your nail art. Whether you prefer short and chic nails or long and glamorous ones, finding the right length for your desired design is key.
The optimal length for different nail designs largely depends on personal preference and the specific style you want to achieve. For instance, if you’re going for a bold and striking design, such as intricate nail patterns or 3D designs, longer nails may be more suitable. The added length provides a larger canvas to showcase the detailed art and allows for more creativity.
On the other hand, if you prefer subtler and more minimalist designs, shorter nails are often a better choice. Short nails can still be stylish and elegant, especially when paired with minimalist designs like French tips, geometric shapes, or simple color blocking. These designs can create a sophisticated and polished look even with shorter nail lengths.
- Choosing the Right Nail Shape: The shape of your nails also plays a role in determining the optimal length for different designs. Certain shapes, like almond or stiletto, may require longer nails to achieve the desired effect. Others, like rounded or square-shaped nails, can work well with shorter lengths.
- Accentuate with Patterns and Textures: Adding patterns and textures to your nail designs can elevate their appearance. The optimal length for these designs may vary depending on the intricacy of the patterns and the desired visual impact.
- Experimenting with Bold Colors: Bold colors can make a statement and draw attention to your nails. The optimal length for bold color designs may vary based on the color choice and the overall look you want to achieve.
| Design Style | Optimal Nail Length |
|---|---|
| Intricate patterns or 3D designs | Longer nails |
| French tips, geometric shapes, or color blocking | Shorter nails |
| Almond or stiletto shapes | Longer nails |
| Rounded or square-shaped nails | Shorter nails |
Ultimately, the optimal length for different nail designs is a matter of personal preference and experimentation. It’s important to consider the specific design style, your daily activities, and your comfort level. Taking care of your nails and maintaining their health should also be a priority, regardless of the length you choose.
Accentuate with Patterns and Textures
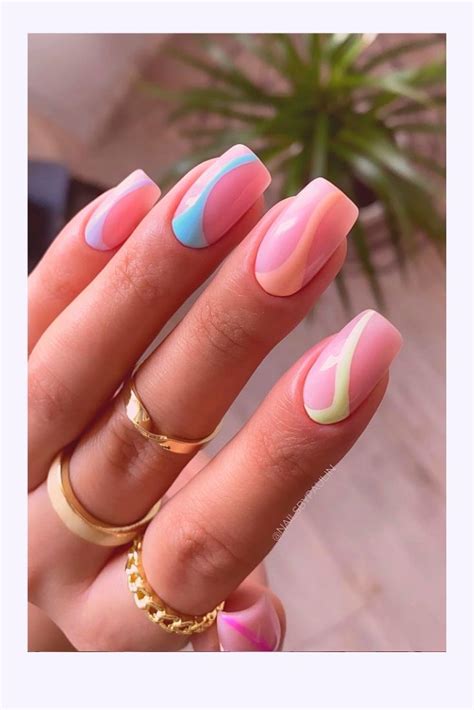
When it comes to nail designs, there are countless options to choose from. One way to elevate your nail art game is by accentuating your nails with patterns and textures. Patterns and textures add depth, dimension, and visual interest to your manicure, making it stand out from the crowd. Whether you prefer subtle designs or bold statements, incorporating patterns and textures into your nail art is a surefire way to make a statement.
One of the easiest ways to accentuate your nails with patterns is by using nail wraps or stickers. These pre-made designs come in a variety of patterns and textures, allowing you to instantly transform your nails without any artistic skills. Simply apply the nail wrap or sticker onto your nail, smooth out any wrinkles, and seal it with a topcoat for a long-lasting design. Nail wraps and stickers are a convenient option for those who want to experiment with different patterns and textures without spending hours on nail art.
If you have a steady hand and a knack for nail art, you can also create your own patterns using nail polish and nail art tools. From freehand designs to stamping and stenciling, the possibilities are endless. Try incorporating different textures by using matte topcoats, glitter polishes, or even adding 3D elements like studs and rhinestones to your nail design. The key is to experiment and have fun with different patterns and textures to create a unique and eye-catching manicure.
To make the content visually appealing, you can also create a list of popular patterns and textures to inspire your next nail art creation. Here are a few ideas to get you started:
- Stripes: Classic and versatile, stripes can be created using thin nail art brushes or striping tape.
- Animal Prints: From leopard spots to zebra stripes, animal prints add a fun and bold touch to your nails.
- Geometric Designs: Play with lines, triangles, and shapes to create modern and abstract nail art.
- Floral Patterns: Delicate and feminine, floral patterns can be achieved using nail art brushes or water decals.
- Marble Effects: Create a luxurious marble effect using a water marble technique or with nail polish and plastic wrap.
In addition to patterns, textures can also take your nail art to the next level. From fuzzy velvet finishes to gritty sand-like textures, there are various ways to incorporate textures into your nail designs. Nail polishes with textured finishes are widely available in stores, or you can create your own by adding a matte topcoat or mixing in glitter or powder into your nail polish. The texture will add an interesting tactile element to your manicure, making it not only visually appealing but also an interactive experience.
In conclusion, patterns and textures are excellent ways to accentuate your nails and take your nail art to the next level. Whether you opt for pre-made nail wraps, create your own designs, or experiment with various textures, the key is to have fun and express your unique style. So go ahead, let your creativity run wild, and embrace the world of patterns and textures in your next manicure!
Experimenting with Bold Colors
Bold colors can make a powerful statement when it comes to nail art. Whether you prefer vibrant neons or deep jewel tones, experimenting with bold colors can take your manicure to the next level. Not only do bold colors add excitement and personality to your nails, but they can also be a great way to express your creativity and style. In this blog post, we will explore different ways to experiment with bold colors and create unique and eye-catching nail designs.
One of the simplest ways to experiment with bold colors is by opting for a full-color manicure. Choose a single bold color that speaks to you and apply it to all of your nails. This creates a bold and unified look that is sure to catch attention. To make the color pop even more, consider adding a glossy top coat, which will enhance the shine and vibrancy of the polish.
If you’re feeling a bit more adventurous, you can play with bold color combinations. Choose two or more bold colors that complement each other and create a unique and striking contrast. For example, pairing a bright yellow with a rich purple can create a bold and eye-catching look. Consider using these color combinations to create geometric patterns or color blocking designs on your nails.
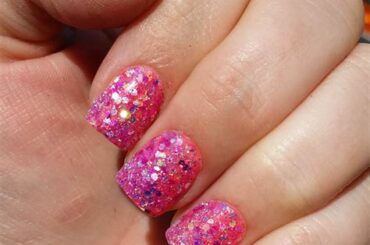
- Experiment with different finishes – Bold colors come in a variety of finishes, such as matte, metallic, and glitter. Don’t be afraid to experiment with these different finishes to add even more visual interest to your manicure. For a more edgy look, try a bold matte color. For a glamorous look, opt for a bold metallic shade. And for a fun and playful look, incorporate a bold glitter polish into your design.
- Create ombre effects – Ombre nails are a popular trend that can easily be achieved with bold colors. Start with one bold color at the base of your nail and gradually fade it into another bold color towards the tips. This creates a seamless and gradient effect that adds depth and dimension to your nails.
- Use bold colors as accents – If you’re not ready to commit to a full-color manicure, you can still experiment with bold colors by using them as accents. Choose a neutral base color and add pops of bold color to a few nails. This allows you to showcase your love for bold colors while still keeping the overall look more subtle and versatile.
| Pros | Cons |
|---|---|
| Eye-catching and unique designs | May not be suitable for all occasions or professional settings |
| Allows for self-expression and creativity | Requires regular maintenance and touch-ups |
| Can boost confidence and mood | Requires proper nail care to prevent damage |
Experimenting with bold colors is a great way to have fun with your manicure and show off your personal style. Whether you choose to go all out with a full-color manicure or add pops of bold color as accents, the possibilities are endless. So why not step out of your comfort zone and embrace the world of bold colors?
Elevating Short Nails with Minimalistic Designs
When it comes to nail designs, shorter nails don’t have to be ignored. In fact, minimalistic designs can elevate short nails and create a chic and stylish look. Minimalistic designs focus on simplicity and clean lines, making them perfect for shorter nails. Whether you prefer a classic French manicure or a trendy geometric pattern, there are plenty of options to choose from.
One way to elevate short nails with minimalistic designs is by opting for a monochromatic color scheme. Choose a single color that complements your skin tone and apply it to your nails. This will create a sleek and sophisticated look that elongates your nails. You can also add a touch of shimmer or a matte finish to add some dimension to your minimalistic design.
Another option is to play with negative space. Instead of covering the entire nail with polish, leave some parts bare to create geometric shapes or patterns. This not only adds visual interest but also gives the illusion of longer nails. Experiment with different shapes such as triangles, half moons, or diagonal lines.
- Choose a monochromatic color scheme
- Play with negative space
- Experiment with geometric shapes
Incorporating nail accessories is another way to elevate short nails with minimalistic designs. A simple and delicate nail accessory, such as a tiny stud or a minimalist nail charm, can instantly add flair to your nails. Place the accessory strategically on one or two nails to create a focal point. Remember to keep the rest of the nails minimalistic to maintain a clean and stylish look.
| Color Scheme | Negative Space | Nail Accessories |
|---|---|---|
| Monochromatic | Geometric Shapes | Delicate Charms |
| Sleek and sophisticated | Illusion of longer nails | Added flair |
Elevating short nails with minimalistic designs is all about simplicity and attention to detail. By choosing the right color scheme, experimenting with negative space, and incorporating nail accessories, you can create a stunning look that makes your shorter nails stand out. Embrace minimalism and let your nails make a statement.
Playing with Negative Space Nail Art
Nail art has become a popular form of self-expression, allowing individuals to showcase their creativity and style. One trend that has gained traction in recent years is negative space nail art. This unique technique utilizes the natural nail as part of the design, creating visually striking patterns and shapes. By strategically leaving empty spaces on the nail, artists can create an illusion of depth and dimension. Let’s explore how you can play with negative space nail art to create stunning designs.
When it comes to negative space nail art, the possibilities are endless. One popular technique is to incorporate geometric shapes into the design. By using striping tape or nail stencils, you can create clean lines and precise angles on the natural nail. These geometric patterns can be as simple or complex as you desire, allowing you to experiment with different shapes and sizes. Whether you opt for triangles, squares, or even chevrons, the negative space will add a modern and edgy touch to your nail art.
In addition to geometric shapes, you can also experiment with negative space by incorporating cutouts and peekaboo designs. This involves strategically removing sections of nail polish to reveal the natural nail underneath. For example, you can create a half-moon design by leaving a semicircle of the nail bare at the base. Alternatively, you can create intricate cutouts by using a small brush or dotting tool to remove sections of polish, revealing the negative space beneath. These cutout designs add a touch of elegance and sophistication to your nails.
- Geometric shapes
- Cutouts and peekaboo designs
- Gradient negative space
- Minimalistic negative space
- Textured negative space
Another way to play with negative space is by incorporating gradient techniques. This involves creating a smooth transition of colors from one end of the nail to the other, while leaving empty spaces in between. By using a sponge or a small brush, you can blend different shades together to achieve a stunning ombré effect. The negative space in the design adds depth and complexity, making your nails stand out.
If you prefer a more minimalistic approach, you can opt for negative space designs with simple accents. For instance, you can paint a single line or dot along the natural nail, leaving the rest of the nail bare. This minimalist style creates a clean and modern look, perfect for those who prefer a subtle nail art design.
| Pros | Cons |
|---|---|
| Unique and eye-catching designs | Requires precise application |
| Allows the natural nail to be part of the design | Can be challenging for beginners |
| Endless possibilities for creativity | May require additional time and effort |
Incorporating negative space into your nail art can elevate your manicure to a whole new level. Whether you prefer bold and intricate designs or simple and minimalist styles, negative space allows you to experiment with various techniques and create unique nail art masterpieces. So why not give it a try and let your creativity shine through your nails?
Incorporating Nail Accessories for Extra Flair
When it comes to expressing our personal style, we often turn to fashion and beauty to make a statement. Nail art has become increasingly popular in recent years, allowing individuals to showcase their creativity and personality through their fingertips. While nail polish and intricate designs are common, why not take your nail game to the next level by incorporating nail accessories for some extra flair? From rhinestones and studs to decals and charms, the possibilities are endless.
One way to incorporate nail accessories is by using rhinestones. These tiny, sparkling gems can add a touch of glamour and elegance to any manicure. Whether you prefer a single statement rhinestone or a pattern created with multiple stones, this accessory is sure to catch the eye. To apply rhinestones, simply use a dotting tool or tweezers to carefully place them onto your nails while the polish is still wet. Seal the design with a clear top coat, and you’re ready to dazzle.
Another popular nail accessory is studs. These come in various shapes, sizes, and colors, making them versatile for any nail design. Whether you’re aiming for a punk-inspired look or a more edgy style, studs can help you achieve it. Simply press the studs onto the nail while the polish is still wet, using a toothpick or a stud picker tool. Make sure to seal the design with a top coat to ensure longevity.
For those who are looking for a quick and easy way to add some pizzazz to their nails, nail decals are the perfect option. These pre-designed images can range from simple symbols to intricate patterns and can be applied directly onto the nail. To use nail decals, start by applying a base coat of polish and letting it dry. Once dry, carefully peel off the decal from its backing and place it onto your desired nail. Press down gently to ensure it adheres well, and finish with a top coat to seal the design.
Besides rhinestones, studs, and decals, there are also various other nail accessories you can experiment with. Nail charms are small decorative elements that can be attached to the nails with nail glue or embedded into acrylic or gel nails. These charms come in a wide range of designs, from flowers and bows to butterflies and stars. Choose a charm that complements your style and attach it to your nails for an added touch of allure.
Incorporating nail accessories is an excellent way to elevate your manicure and make a statement. Whether you prefer a subtle and understated look or a bold and dazzling one, there is a wide array of options to explore. From rhinestones and studs to decals and charms, let your creativity soar and give your nails the extra flair they deserve.
Summary:
– Rhinestones, studs, decals, and charms are popular nail accessories.
– Rhinestones add glamour and elegance to any manicure. Apply them with a dotting tool or tweezers.
– Studs can create a punk-inspired or edgy look. Press them onto the wet polish using a toothpick or stud picker tool.
– Nail decals offer a convenient way to add designs to your nails. Apply them after a base coat and seal with a top coat.
– Nail charms can be attached with nail glue or embedded into acrylic or gel nails for added allure.
– Explore different nail accessories to express your personal style and elevate your manicure.
Frequently Asked Questions
What factors should be considered when choosing the right nail shape?
When choosing the right nail shape, you should consider the length of your natural nails, the shape of your cuticles, and your personal style preferences.
What is the optimal length for different nail designs?
The optimal nail length for different designs can vary, but generally, shorter nails work well for minimalistic and negative space designs, while longer nails are better for intricate and detailed nail art.
How can patterns and textures be used to accentuate nail designs?
Patterns and textures can be used to add interest and dimension to nail designs. They can be incorporated through nail polish techniques like marbling, stamping, or using textured nail polishes.
What are some bold colors that can be experimented with for stand-out nail looks?
Some bold colors that can be experimented with for stand-out nail looks include vibrant neons, jewel tones, metallic shades, and holographic polishes.
How can minimalistic designs elevate short nails?
Minimalistic designs can elevate short nails by using clean lines, geometric shapes, and negative space to create visually appealing and simple yet chic nail looks.
How can negative space nail art be incorporated into designs?
Negative space nail art can be incorporated into designs by leaving parts of the natural nail exposed or using clear or sheer polishes to create cut-out or negative space effects.
What are some nail accessories that can be used to add extra flair to nail designs?
Some nail accessories that can be used to add extra flair to nail designs include rhinestones, studs, decals, stickers, and nail jewelry.

