Get ready to create stunning Sharpie nail art with our step-by-step guide. From preparing your nails to showing off your designs, we’ve got you covered!
Gather Your Supplies
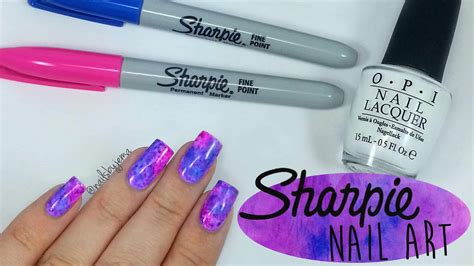
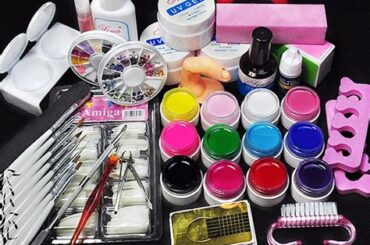
Before you begin creating your Sharpie nail art, it’s important to gather all the necessary supplies. You will need a variety of colored Sharpie markers, rubbing alcohol or nail polish remover, a base coat and top coat nail polish, and some cotton swabs or nail art brushes. Make sure you have a clean, well-lit workspace where you can comfortably work on your nails without any distractions.
Next, gather any additional embellishments you may want to use, such as rhinestones or nail decals. Having all your supplies readily available will make the process more enjoyable and efficient.
Once you have all your supplies organized and ready to go, you can move on to the next step in creating your Sharpie nail art masterpiece.
Prepare Your Nails
Before you start the process of creating Sharpie nail art, it’s important to properly prepare your nails. Begin by removing any old polish with a gentle nail polish remover. This will ensure a clean canvas for your new design.
Next, trim and shape your nails to your desired length and style. Use a nail file to smooth out any rough edges and create a polished look. If you want to go the extra mile, you can also soak your nails in warm water to soften the cuticles and make them easier to push back.
Once your nails are clean and prepped, apply a base coat of clear nail polish. This will help protect your nails from the Sharpie ink and create a smooth surface for your design. Allow the base coat to dry completely before moving on to the next step.
Choose Your Designs
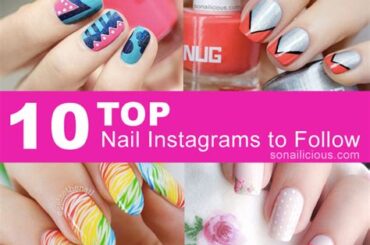
When it comes to creating Sharpie nail art, choosing your designs is a crucial step in the process. Whether you’re going for a simple and elegant look or something bold and colorful, the possibilities are endless. Take some time to consider the themes, patterns, and colors that resonate with your personal style. You might also want to browse through nail art inspiration on social media or Pinterest to get some ideas.
Consider the size and shape of your nails when deciding on a design. Some designs may work better on longer nails, while others may be more suitable for shorter nails. If you’re new to nail art, start with simpler designs before attempting more intricate patterns. Once you’ve chosen your designs, gather your Sharpie markers in the colors you need, and prepare your nails for the next steps in the process.
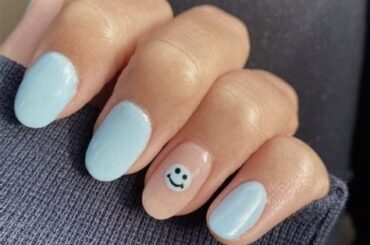
Remember that Sharpie nail art is all about creativity and self-expression, so don’t be afraid to experiment with different designs. Whether you opt for floral patterns, geometric shapes, or abstract art, the key is to have fun and enjoy the creative process. With a little practice and the right designs, you can create stunning Sharpie nail art that will leave everyone impressed.
Practice Your Technique
When creating Sharpie nail art, it’s important to practice your technique in order to achieve the best results. Start by choosing the Sharpie colors you want to use and make sure they are vibrant and not dried out. Then, gather your supplies including a base coat, top coat, and rubbing alcohol. Before you begin, it’s essential to prep your nails by removing any old polish and cleaning them thoroughly.
Once your nails are prepped, it’s time to practice your technique by experimenting with different designs on a piece of paper. This will help you get a feel for using the Sharpie on a small surface and allow you to perfect your desired designs. After you feel comfortable with the technique, you can move on to applying the designs onto your nails.
Remember, practicing your technique beforehand will help you avoid any mistakes and ensure your Sharpie nail art turns out beautifully. Don’t be afraid to get creative and try out different patterns and styles until you find the perfect look for you. With a bit of patience and practice, you’ll soon be a Sharpie nail art pro!
Draw Your Designs
When creating Sharpie nail art, drawing your designs is a crucial step in the process. Before you begin, gather all your supplies including Sharpie markers in the colors of your choice, nail polish remover, cotton pads, and clear top coat. Make sure your nails are clean and free of any old polish or oils by using a non-acetone nail polish remover. Once your nails are prepped, you can begin to draw your designs.
Take your chosen Sharpie marker and carefully begin to draw your desired designs on each nail. Whether it’s simple lines, intricate patterns, or even tiny drawings, the possibilities are endless. It’s important to take your time during this step to ensure precision and detail in your artwork. If you make any mistakes, simply use a cotton pad dipped in nail polish remover to gently erase any errors and start over.
After you have finished drawing your designs, allow them to dry completely before applying a clear top coat to seal in your artwork. This not only protects the designs but also gives your nails a glossy finish. Once your Sharpie nail art is complete, you can show off your unique and vibrant designs to all your friends and family!
Add Some Flair
Once you have drawn your designs on your nails using Sharpie markers and allowed them to dry, it’s time to add some flair. You can get creative and use some additional nail art supplies to enhance your design. Consider adding some rhinestones, glitter, or nail stickers to make your Sharpie nail art really stand out. The key is to have fun and let your creativity shine!
Another way to add some flair is by incorporating different colors into your design. You can use multiple Sharpie markers to create a vibrant and eye-catching look. Experiment with different color combinations and patterns to make your nail art truly unique.
After you have added some flair to your Sharpie nail art, finish off with a clear top coat to seal in your design and make it last longer. This final step will also help to protect your artwork and give it a professional finish.
Seal Your Artwork
Once you have finished creating your Sharpie nail art, it is important to seal your artwork to ensure it lasts as long as possible. The sealer will protect your designs and prevent them from smudging or fading. Look for a good quality clear topcoat that is specifically designed for nail art. Apply a thin layer of the topcoat over your designs, making sure to cover the entire surface of your nails. This will not only seal in your artwork but also give your nails a glossy finish.
After applying the topcoat, allow your nails to dry completely. This will ensure that the topcoat effectively seals and protects your artwork. Once your nails are dry, you can apply a second layer of topcoat for added protection. Be sure to let the topcoat dry thoroughly before using your hands for any activities to prevent smudging or damaging your artwork.
Sealing your Sharpie nail art is an essential step to preserving your designs and keeping them looking fresh for as long as possible. With the right topcoat and proper application, you can enjoy your unique nail art for days or even weeks without worry of smudging or fading.
Clean Up Any Mistakes
One of the best things about creating Sharpie nail art is that if you make a mistake, it’s easy to fix. When it comes to cleaning up any mistakes, the first step is to wait until the Sharpie ink is completely dry. Attempting to clean up a mistake while the ink is still wet could result in smudging and making the mistake worse. Once the ink is dry, take a cotton swab or a small brush and dip it in some rubbing alcohol. Gently dab at the mistake, being careful not to rub too hard and remove too much of the design.
If the mistake is too large to simply dab away with rubbing alcohol, you can also try using a small amount of nail polish remover. Again, be gentle and take your time to avoid removing too much of the design. If the mistake is near the edge of the nail, a small angled brush dipped in nail polish remover can help to clean up the edges and give your Sharpie nail art a clean, polished look.
After cleaning up any mistakes, allow the area to dry completely before adding a top coat to seal in your design. Cleaning up mistakes is a normal part of the nail art process, and with a little practice and patience, you can easily fix any errors and have beautiful Sharpie nail art to show off.
Show Off Your Sharpie Nail Art
Once you’ve completed your Sharpie nail art masterpiece, it’s time to show it off to the world! Whether you’re posting pictures on social media, heading out for a special event, or simply flaunting your nails around town, there are plenty of ways to show off your creative designs.
If you’re proud of your Sharpie nail art, don’t be afraid to share it with your friends and followers. Take some high-quality photos of your nails and share them on platforms like Instagram and Pinterest. You can also join nail art communities and groups to connect with other Sharpie enthusiasts and show off your work.
Another great way to show off your Sharpie nail art is to wear it with confidence wherever you go. Whether you’re attending a party, heading out for a night on the town, or simply running errands, your unique and eye-catching nails are sure to turn heads and spark conversations. Embrace the attention and let your nails be a conversation starter!
Frequently Asked Questions
What materials do I need for Sharpie nail art?
You will need nail polish, a clear top coat, Sharpie markers in various colors, rubbing alcohol, and small paintbrushes for this DIY project.
Can I use any type of Sharpie markers for this nail art project?
It is recommended to use regular Sharpie markers as they work best for this project. Avoid using oil-based or water-based markers as they may not produce the desired results.
How do I create designs with Sharpie markers on my nails?
First, apply a base coat of nail polish and let it dry. Then, use the Sharpie markers to draw your desired designs on your nails. You can also use a small paintbrush dipped in rubbing alcohol to create a watercolor effect with the markers.
Will the Sharpie designs smudge or fade?
To prevent smudging and fading, it is important to apply a clear top coat over the Sharpie designs once they have dried. This will help seal the designs and make them last longer.
Is Sharpie nail art easy to remove?
Yes, Sharpie nail art can be easily removed with nail polish remover, just like regular nail polish. Simply soak a cotton pad in nail polish remover and gently rub it over the Sharpie designs to remove them.
Can I create intricate designs with Sharpie nail art?
Yes, you can create intricate designs with Sharpie nail art by using fine-tipped Sharpie markers or small paintbrushes dipped in rubbing alcohol to create detailed patterns.
Are there any tips for beginners attempting Sharpie nail art?
For beginners, it is helpful to practice on a plastic sheet or nail wheel before attempting the designs on your own nails. This will allow you to perfect your technique and get comfortable with using the Sharpie markers.

