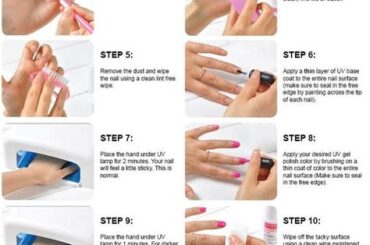
Learn how to create stunning ombre nails with our step-by-step guide, from gathering supplies to applying the finishing touches and maintenance tips. Perfect your nail art skills today!
Gathering necessary nail supplies
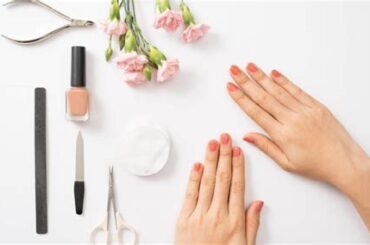
Before you can begin creating stunning ombre nails at home, you will need to gather a few essential nail supplies. The first item on your list should be a good quality nail file or nail buffer to shape and smooth the surface of your nails. You will also need a cuticle pusher or cuticle remover to prep your nail beds. In addition, make sure to have a gentle nail polish remover and cotton pads on hand to remove any existing nail polish. Finally, select your desired ombre nail polish colors, keeping in mind that you will need at least two complementary shades to achieve the gradient effect.
It’s important to have a flat surface to work on, so consider investing in a nail art mat or disposable surface protectors. You may also want to have some small nail art brushes or sponges to help blend the colors seamlessly. And don’t forget a good quality top coat to seal and protect your ombre nails once they are complete. By gathering these necessary nail supplies, you will be well-prepared to tackle the ombre nail design process at home with confidence.
Remember, when selecting your ombre nail polish colors, you’ll also want to ensure that they are from trusted nail polish brands known for their high quality and long-lasting wear. Having the right tools and products at your disposal will make the process of creating ombre nails at home much more enjoyable and successful. With these necessary supplies gathered, you are ready to move on to the next step in the ombre nail design process.
Preparing the nails for ombre
Before starting the process of creating ombre nails, it’s important to properly prepare the nails to ensure the best results. Begin by removing any old nail polish with nail polish remover and then wash your hands thoroughly to remove any leftover residue. Use a nail file to shape your nails to your desired length and shape, taking care to file in one direction to prevent any damage or breakage.
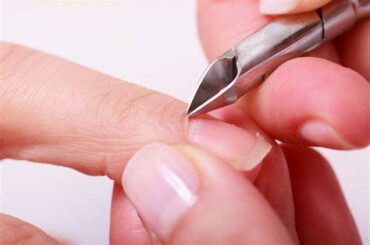
Once your nails are shaped, it’s time to work on the cuticles. Apply a cuticle remover and use a cuticle pusher to gently push back the cuticles, being careful not to damage the delicate skin. This step is important to create a clean and smooth surface for the ombre effect to adhere to.
After preparing the nails, it’s essential to give them a good clean before applying any nail polish. Use a nail brush to scrub the nails and remove any dirt or oils, then dry them thoroughly to ensure the nail polish goes on smoothly and evenly.
Choosing ombre color combinations
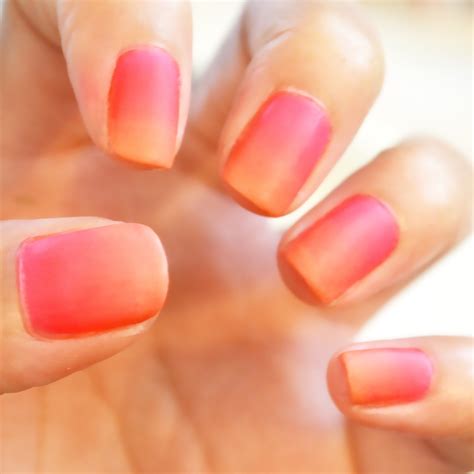
When it comes to creating the perfect ombre nails, the choice of color combinations is crucial. The key to a beautiful ombre effect is selecting colors that blend seamlessly together, creating a smooth transition from one shade to another.
One popular option for ombre nails is choosing shades within the same color family. For example, selecting different shades of blue or pink can result in a stunning ombre effect. This approach creates a subtle and elegant look, perfect for any occasion.
Alternatively, you can opt for more daring color combinations, such as pairing contrasting hues like purple and yellow, or blue and orange. These bold choices can make a statement and add a pop of color to your nails, perfect for those who want to showcase their creativity.
Applying base coat
Applying base coat
Before you begin creating your ombre nails, it’s important to start with a base coat. This will help protect your nails from any potential damage and create a smooth surface for the ombre effect.
Start by selecting a strong base coat that is designed to protect and strengthen your nails. Apply a thin, even layer to each nail, making sure to cover the entire surface. Allow the base coat to dry completely before moving on to the next step.
By applying a strong base coat, you can ensure that your ombre nails will last longer and look more professional. This simple step will help to create a flawless and long-lasting ombre manicure.
Creating the ombre effect
Creating the ombre effect
Creating the ombre effect on your nails is a fun and stylish way to add some flair to your look. To start, you’ll want to gather all the necessary nail supplies like nail polish, nail file, and makeup sponge. Once you have everything you need, you’ll want to begin by preparing your nails for the ombre. This can be done by shaping and buffing the nails to create a smooth surface for the color to adhere to.
After preparing the nails, it’s time to choose the perfect ombre color combinations. You can go for a classic ombre look by choosing shades of the same color, or get creative with different color combinations. Once you’ve selected your colors, apply a base coat to your nails to help protect them and provide a smooth canvas for the ombre effect.
Now comes the fun part – actually creating the ombre effect! To do this, you’ll need a makeup sponge to dab the different colors onto your nails, creating a seamless transition from one color to the next. Start by painting the two chosen colors side by side on the makeup sponge, then lightly press the sponge onto your nail, blending the colors seamlessly together. Repeat this process until your nails have the desired ombre effect.
Blending the colors seamlessly
When creating ombre nails at home, one of the most important steps is blending the colors seamlessly. This step is crucial in achieving a smooth, gradient transition from one color to the next.
Start by applying the first color to the nail, ensuring full coverage. Then, using a makeup sponge, dab the second color onto the sponge and gently press onto the nail, focusing on the area where the two colors meet. This technique helps to blend the colors together seamlessly.
Take your time with this step, as achieving a flawless ombre effect requires patience and precision. Once the colors are blended to your liking, finish off with a top coat to seal in the design and protect your ombre nails.
Adding finishing touches
When it comes to creating ombre nails at home, adding finishing touches is the final step that can make all the difference. Once you have perfected the ombre effect and achieved a seamless blend of colors, it’s time to add those special details that will elevate your ombre nails to the next level. Whether it’s adding a touch of shimmer, applying nail art, or placing decals, the finishing touches can truly make your ombre nails stand out.
One popular finishing touch for ombre nails is the addition of glitter. By carefully applying a layer of glitter over the ombre effect, you can add depth and sparkle to your nails. You can also experiment with different colors of glitter to complement your chosen ombre color combination, creating a unique and eye-catching look.
Another way to add finishing touches to your ombre nails is through the use of nail art. Whether you prefer intricate designs or simple patterns, nail art can be the perfect way to customize your ombre nails. From floral patterns to geometric shapes, the possibilities are endless when it comes to adding nail art to your ombre nails.
Sealing the ombre nails with top coat
After creating the perfect ombre effect on your nails, the final step to achieving flawless ombre nails is sealing the ombre nails with top coat. This step is crucial in ensuring the longevity and durability of your ombre manicure.
Once you have achieved the desired ombre effect by blending the colors seamlessly, it’s time to apply a top coat to seal in the design. The top coat not only adds a glossy finish to your nails, but also protects the ombre design from chipping and fading.
When applying the top coat, make sure to cover the entire nail surface, including the tips, and seal the edges to prevent any peeling. Allow the top coat to fully dry to ensure a long-lasting ombre manicure that will keep your nails looking flawless for days.
Tips for maintaining ombre nails
After spending time creating your stunning ombre nails, it’s important to know how to maintain them to keep them looking beautiful for as long as possible. One of the most important tips for maintaining ombre nails is to regularly apply a top coat. This will help to seal in the colors and prevent chipping or fading. Make sure to reapply the top coat every few days to keep your ombre nails looking fresh.
Another tip for maintaining ombre nails is to avoid using your nails as tools. While it may be tempting to use your nails to open packages or remove stickers, this can cause damage to the ombre effect and lead to premature wear and tear. Instead, use the proper tools for these tasks to keep your nails looking their best.
Lastly, it’s important to moisturize your nails and cuticles regularly. Dry, brittle nails are more prone to chipping and breaking, so keeping them moisturized will help maintain the ombre effect. Use a nourishing cuticle oil or hand cream daily to keep your nails and cuticles healthy and strong.
Frequently Asked Questions
What is ombre nails?
Ombre nails are a nail art technique where the color fades from light to dark, or vice versa, creating a gradient effect.
What materials do I need to create ombre nails at home?
You will need two or more nail polish colors, a makeup sponge, nail polish remover, and top coat.
How do I create ombre nails using a makeup sponge?
Apply the lightest nail polish color as a base, then apply the other colors onto the makeup sponge and dab it onto your nails to create the ombre effect. Finish with a top coat.
Can I use different colors for ombre nails?
Yes, you can use any combination of colors to create ombre nails, including pastel shades, neons, or even metallics.
How long does it take to create ombre nails at home?
It can take around 30-45 minutes to complete ombre nails at home, including drying time between each layer of nail polish.
Can I add glitter or nail art to ombre nails?
Yes, you can add glitter or nail art on top of your ombre nails to customize the look even further.
How do I maintain ombre nails?
To maintain ombre nails, apply a top coat every few days to prevent chipping and keep your nails looking fresh.

