Preparation for Nail Tip Application
Preparing your nails properly before applying nail tips is crucial for achieving a successful and long-lasting manicure. By following the right steps, you can ensure that your nail tips adhere well and stay in place for weeks to come. Here are some essential tips to help you prepare your nails for nail tip application:
- Clean your nails: Start by removing any old nail polish using an acetone-based nail polish remover. This will ensure that your nails are clean and free from any residue.
- Trim and shape your nails: Use a nail clipper to trim your nails to your desired length. Then, use a nail file to shape them. Whether you prefer square, round, or oval nails, make sure to file them in one direction to prevent them from splitting or peeling.
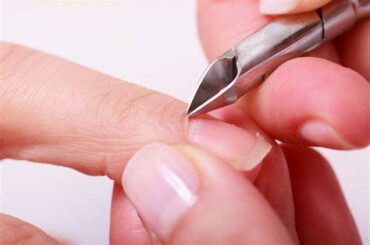
- Push back your cuticles: Gently push back your cuticles using a cuticle pusher or a wooden stick. By doing this, you create a clean and even surface for the nail tips to adhere to.
Once you have completed these preparation steps, your nails are ready for nail tip application. Following these steps not only ensures better adhesion but also promotes the overall health of your natural nails. So, take the time to properly prepare your nails before applying nail tips for a stunning and long-lasting manicure.
Choosing the Right Nail Tips
When it comes to achieving the perfect manicure, choosing the right nail tips is essential. Nail tips are a popular choice for those looking to enhance the length or shape of their nails. With a wide variety of options available, it can be overwhelming to know which ones to choose. However, by considering a few factors, you can make an informed decision that will result in stunning and long-lasting results.
Firstly, it is important to consider the material of the nail tips. The most common options include acrylic, gel, and natural nail tips. Acrylic tips are known for their durability and strength, making them suitable for those with brittle nails. Gel tips, on the other hand, offer a more natural look and are flexible, providing a comfortable fit. Natural nail tips are made from real nails and offer the most realistic appearance.
Another factor to consider is the shape and size of the nail tips. The shape should complement the shape of your natural nails and your personal style. Common options include square, round, oval, and stiletto. The size of the nail tips should match the width and length of your natural nails to ensure a seamless and natural-looking application.
- Material: Consider the durability and appearance of acrylic, gel, and natural nail tips.
- Shape: Choose a shape that complements your natural nails and personal style, such as square, round, oval, or stiletto.
- Size: Ensure the nail tips match the width and length of your natural nails for a seamless look.
In addition to considering the material, shape, and size, it is also important to take into account your skill level and desired maintenance. Some nail tips may require more frequent fills or maintenance, while others may be more resistant to lifting or breakage. Consulting with a nail technician or doing thorough research can help you choose nail tips that suit your needs and preferences.
| Nail Tip Material | Pros | Cons |
|---|---|---|
| Acrylic | Durable and strong | May require more maintenance |
| Gel | Natural-looking and flexible | Less durable than acrylic |
| Natural | Realistic appearance | May be more expensive |
In conclusion, choosing the right nail tips is an important step in achieving a flawless manicure. By considering factors such as material, shape, size, and maintenance, you can select nail tips that best suit your individual needs and preferences. Whether you opt for acrylic, gel, or natural nail tips, the key is to choose ones that make you feel confident and beautiful.
Tools for Nail Tip Application
When it comes to nail tip application, having the right tools is essential for achieving professional-looking results. Whether you’re a beginner or an experienced nail technician, having a set of reliable and high-quality tools can make the process much easier and more efficient. In this blog post, we will discuss the must-have tools for nail tip application and how they can help you create beautiful and long-lasting nail extensions.
1. Nail Tips: The first tool you will need for nail tip application is, of course, the nail tips themselves. Nail tips come in various shapes, sizes, and materials, so it’s important to choose the right ones for your desired style and client’s preferences. Whether you opt for plastic, acrylic, or gel nail tips, make sure they are of good quality to ensure durability and a natural appearance.
2. Nail Glue: Nail glue is an essential tool for attaching the nail tips to the natural nails. Look for a nail glue that is specifically formulated for nail extension applications. The glue should provide a strong bond but also allow for easy removal when needed. Apply a small amount of glue to the back of the nail tip and press it firmly onto the natural nail for a few seconds until it adheres.
3. Nail Tip Cutter: A nail tip cutter is a handy tool for trimming and shaping the nail tips to your desired length and style. This tool allows you to easily customize the nail tips to fit the natural nails perfectly. Use the nail tip cutter to remove any excess length and shape the tips into square, round, or almond shapes, according to your client’s preference.
4. Nail File: A nail file is essential for refining the edges and surface of the nail tips. Opt for a medium-grit file that allows for easy shaping and smoothing without causing damage to the natural nails. Use the nail file to gently buff the edges of the nail tips and blend them seamlessly with the natural nails for a seamless and natural appearance.
5. Buffing Block: A buffing block is a multipurpose tool that helps in achieving a smooth and even surface on the nail tips. Use the different sides of the buffing block to gently buff away any imperfections, ridges, or unevenness on the nail tips, creating a perfect canvas for nail polish or other nail art designs.
6. Nail Brush: A nail brush is essential for keeping the nails clean and free from any debris or dust. Use a nail brush to gently clean the nail tips and the surrounding area before and after the application process. This will ensure that the nail tips adhere well and the final result is flawless.
7. Nail Primer: While not mandatory, a nail primer can greatly enhance the adhesion and longevity of the nail tips. Apply a thin layer of nail primer to the natural nails before applying the nail tips. This will create a strong bond between the natural nails and the tips, preventing lifting or chipping.
In conclusion, having the right tools for nail tip application is crucial for achieving professional-looking results. Invest in high-quality nail tips, nail glue, nail tip cutter, nail file, buffing block, nail brush, and nail primer to ensure a seamless and long-lasting nail extension. With these essential tools in your arsenal, you’ll be able to create beautiful, durable, and stunning nail tips for your clients.
Applying Nail Tips Properly
When it comes to achieving a flawless manicure, properly applying nail tips is key. Nail tips are an easy and convenient way to instantly add length and shape to your nails. Whether you’re a professional nail technician or a DIY enthusiast, learning how to apply nail tips properly is essential for creating beautiful and long-lasting manicures. In this blog post, we will explore the step-by-step process of applying nail tips, along with some useful tips and tricks to ensure a professional finish.
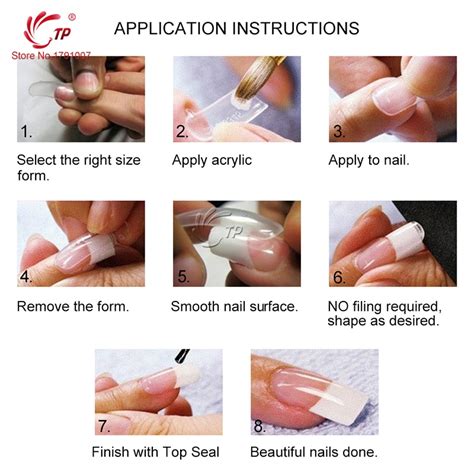
Before you begin the application process, it’s important to prepare your natural nails. Start by removing any existing nail polish and gently push back your cuticles using a cuticle pusher. This will create a clean and smooth surface for the nail tips to adhere to. Next, you’ll need to select the right nail tips for your desired look. There are various shapes and sizes of nail tips available, so be sure to choose ones that fit the natural curve and width of your nails. Choosing the right nail tips will help ensure a natural and comfortable fit.
Now that you have your nail tips ready, it’s time to apply them. Begin by gently buffing the surface of your natural nails using a nail file. This will help the nail tips adhere better and promote longevity. Apply a small drop of nail glue onto the back of the nail tip and carefully place it onto your natural nail, starting at the cuticle area. Press down firmly to ensure a secure bond. Repeat this process for each nail, making sure to align the nail tips correctly with your natural nail bed. Applying nail tips properly requires precision and attention to detail.
Once all the nail tips are applied, it’s time to shape and customize them to your liking. Use a nail clipper or nail tip cutter to trim the length of the nail tips to your desired size. Then, use a nail file to shape the tips into your preferred style, whether it’s square, round, almond, or any other shape. Be sure to file gently and in one direction to prevent any damage to your natural nails. Once you’re satisfied with the shape, use a buffer to smooth out any rough edges and create a seamless transition between the nail tip and your natural nail. These finishing touches are essential for achieving a professional-looking manicure.
| Tools for Nail Tip Application | Benefits |
|---|---|
| Nail file | Shapes and buffs the nails |
| Nail glue | Securely adheres the nail tips |
| Nail clipper/nail tip cutter | Trims the length of the nail tips |
| Nail buffer | Smoothens rough edges and creates a seamless finish |
In conclusion, applying nail tips properly is an essential skill for achieving a flawless manicure. By following the step-by-step process of preparing your nails, choosing the right nail tips, and using the proper tools, you can create stunning and long-lasting nail extensions. Remember to pay attention to detail and take your time during the application process to ensure a professional finish. With practice and patience, you’ll soon be able to master the art of applying nail tips and enjoy beautiful nails that are sure to turn heads.
Finishing Touches for Nail Tip Application
After completing the application of nail tips, it’s important to give your nails those finishing touches to ensure they look flawless and professional. This final step is crucial in achieving a salon-like finish that will leave your nails looking beautiful and polished. In this blog post, we will discuss some essential tips and techniques for giving those finishing touches to your nail tip application.
Firstly, **shape** your nails to perfection. Use a nail file to gently shape the tips of your nails, making sure they are all uniform in length and shape. Whether you prefer a square, rounded, or almond shape, filing your nails will help refine their appearance and give them a tidy and groomed look. Remember to always file in one direction to prevent any damage or splitting.
Next, it’s time to **buff** your nails. Buffing the surface of your nails not only smoothens any rough edges but also helps create a perfect canvas for applying nail polish. Use a soft buffing block or a buffing file to gently remove any ridges or imperfections on the surface of your nails. This will ensure that your nail polish applies evenly and adheres well to the nails, giving you a long-lasting manicure.
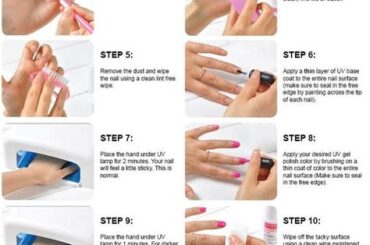
The final step in finishing touches is applying a **top coat**. A top coat not only adds shine and glossiness to your nails but also helps protect the nail polish from chipping and peeling. Apply a thin layer of top coat to each nail, making sure to cap the ends by swiping the brush along the free edge of the nail. This will seal the polish and provide extra durability. Allow the top coat to dry completely before putting your hands to use to avoid any smudging or smearing.
- Shape your nails with a nail file.
- Buff your nails to create a smooth surface.
- Apply a top coat for added shine and protection.
By following these finishing touches, you can enhance the overall appearance of your nail tip application and achieve a professional and elegant look. Take your time with each step, and remember that practice makes perfect. With a little patience and attention to detail, you’ll have beautifully manicured nails that will turn heads and boost your confidence!
Frequently Asked Questions
1. What factors should I consider when choosing nail tips?
When choosing nail tips, you should consider factors such as the shape and size of your natural nails, the desired length and style, and the material of the nail tips (plastic or acrylic).
2. What tools do I need for applying nail tips?
Some essential tools for applying nail tips include nail glue, a nail file, a buffer, a cuticle pusher, nail clippers, and a nail tip cutter.
3. How do I properly apply nail tips?
To apply nail tips properly, start by preparing your natural nails, choosing and sizing the nail tips, applying nail glue, and carefully pressing the tips onto your nails. Then, shape and trim the tips to your desired length and style.
4. How long do nail tips usually last?
Nail tips can last anywhere from two to three weeks with proper care and maintenance. However, this may vary depending on factors such as the quality of the nail tips, the strength of the nail glue, and individual nail care habits.
5. Can I customize the shape and style of nail tips?
Yes, nail tips can be easily customized to achieve your desired shape and style. You can use a nail file or buffer to shape the tips into different nail shapes such as square, round, almond, or stiletto.
6. How should I finish off nail tip application?
After applying the nail tips, you should buff and smooth the surface of the nails, apply a layer of base coat, followed by your preferred nail polish or gel, and finish with a top coat for added shine and durability.
7. How can I maintain and care for nail tips?
To maintain and care for nail tips, avoid using your nails as tools, keep them dry and clean, and apply cuticle oil or nail strengthener regularly. It is also important to protect the nails from excessive moisture and avoid using harsh chemicals or solvents that can weaken the nail tips.


