Choosing the Wrong Nail Tip Size
When it comes to getting the perfect manicure, one of the most important factors to consider is choosing the right nail tip size. The nail tips act as the foundation for your manicure, providing the shape and length that you desire. However, many people make the mistake of choosing the wrong nail tip size, which can result in a less-than-desirable outcome for your nails.
Choosing the right nail tip size is crucial for several reasons. First and foremost, it ensures that your nails look natural and proportionate. If the nail tips are too long or too short, your manicure may look unbalanced and unnatural. Additionally, the wrong nail tip size can also affect the overall durability of your nails. If the nail tips are too big, they may be prone to lifting, while smaller tips may not provide enough support for your natural nails.
So, how do you choose the right nail tip size? The first step is to measure your nails accurately. Take a measuring tape or a nail tip sizer and measure the width of your natural nails. This will give you a good idea of the size of nail tips you should be looking for. Remember, it’s always better to go slightly smaller rather than larger, as you can always file and shape the nail tips to your desired length.
Once you have determined the correct size, it’s time to consider the shape of the nail tips. There are various nail tip shapes available, including square, oval, round, and almond. Each shape has its own unique characteristics and can complement different nail shapes and hand sizes. It’s important to choose a shape that suits your personal style and preferences.
Now that you know the importance of choosing the right nail tip size, you can confidently move forward with your next manicure. By taking the time to measure your nails accurately and selecting the appropriate size and shape of nail tips, you can achieve a beautiful and natural-looking manicure that lasts. Remember, your nails are a reflection of yourself, so make sure to give them the attention and care they deserve.
- Choose the right nail tip size for a natural and proportionate look
- Measure your nails accurately to determine the correct size
- Consider the shape of the nail tips to complement your nail shape and hand size
| Pros | Cons |
|---|---|
| – Natural and proportionate look | – Incorrect size may result in lifting or lack of support |
| – Increased durability | – Incorrect size may look unbalanced or unnatural |
| – Allows for flexibility in shaping and filing |
Improper Nail Tip Application Technique
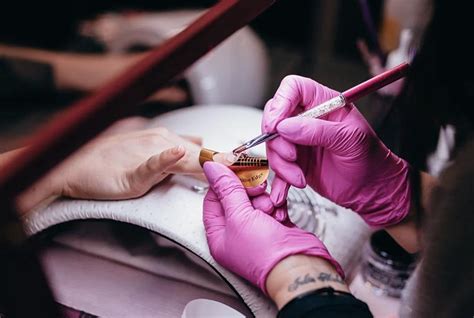
When it comes to achieving fabulous nails, proper nail tip application technique is crucial. Many people make the mistake of not paying enough attention to this aspect of their nail routine, which can result in a less-than-perfect manicure. Whether you’re doing your nails at home or getting them done at the salon, it’s important to know the right way to apply nail tips for a long-lasting and flawless finish.
First and foremost, choosing the right nail tips is essential. One common mistake is selecting the wrong size. Using nail tips that are too small can lead to discomfort and pain, while using ones that are too large can cause the tips to lift and eventually come off. It’s important to measure your natural nails accurately and choose nail tips that match the width and length of your nails.
Next, proper preparation is key to ensure the longevity of your nail tips. Neglecting to prep your natural nails can lead to polish chipping, lifting, or even causing damage to your natural nails. Start by gently pushing back your cuticles and gently buffing the surface of your nails with a nail file. This will help create a smooth surface for the nail tips to adhere to.
When it comes to actually applying the nail tips, using adequate nail glue or adhesive is vital. Using a low-quality glue or adhesive can result in the tips not sticking properly or coming off easily. Invest in a good quality nail glue that is specifically formulated for nail tips. Apply a small amount of glue to the back of the nail tip and carefully press it onto your natural nail, making sure it is centered and aligned.
Lastly, blending and shaping the nail tips is essential for a natural and seamless look. After applying the nail tips, use a nail file to blend the tip with your natural nail, creating a seamless transition. Pay attention to the shaping as well, ensuring that the tips are filed into your desired shape and length. This step is crucial in achieving a salon-quality manicure.
By following these proper nail tip application techniques, you can ensure a flawless and long-lasting manicure. Remember to choose the right nail tips, prep your natural nails properly, use good quality glue or adhesive, and blend and shape the tips for a seamless finish. With these tips in mind, your nails will look fabulous and you’ll be able to enjoy your manicure for days on end!
Not Prepping the Natural Nail Properly
One of the most crucial steps in achieving beautiful and long-lasting nail extensions is properly prepping the natural nail. Sadly, this is also a step that many nail technicians tend to overlook or rush through. Failing to prep the natural nail properly can lead to a whole host of problems, such as lifting, peeling, and even infections. In this blog post, we will delve into the importance of preparing the natural nail before applying nail tips and explore some key techniques to ensure a flawless and durable nail extension application.
Why is prepping the natural nail so important?
Prepping the natural nail is essentially laying the foundation for a successful and long-lasting nail extension. When done correctly, it helps to create a clean canvas for the nail tips to adhere to and ensures that the extension lasts for weeks without any issues. Proper preparation removes any natural oils, debris, or contaminants from the nail surface, allowing the nail glue or adhesive to bond effectively. This step also helps to prevent moisture from getting trapped between the natural nail and the nail tip, which can lead to lifting and bacterial infections.
Key techniques for prepping the natural nail:
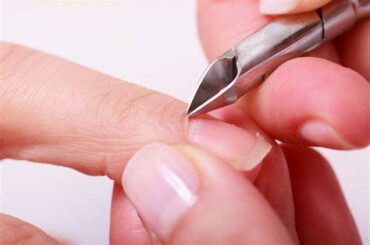
- Start by gently pushing back the cuticles using a cuticle pusher or an orangewood stick. This helps to create a clean and defined nail bed, allowing the nail tips to sit flush against the natural nail.
- Using a fine-grit nail file, lightly buff the surface of the natural nail. This step helps to remove any shine and roughen the nail plate, providing a better surface for the nail glue to adhere to. Be sure not to over-file, as this can weaken the natural nail.
- Next, cleanse the nail surface with a nail dehydrator or alcohol-based nail cleanser. This step removes any remaining oils or contaminants, ensuring optimal adhesion of the nail tips.
- If the natural nails are excessively oily, consider applying a primer specifically designed for improving adhesion. This additional step can greatly enhance the bond between the natural nail and the nail tip.
Conclusion:
Properly prepping the natural nail is a crucial step in achieving flawless and long-lasting nail extensions. By taking the time to push back the cuticles, lightly buff the nail plate, cleanse the nail surface, and potentially apply a primer, you can ensure optimal adhesion and prevent common issues such as lifting and infections. Don’t underestimate the importance of this step, as it can significantly impact the overall success and durability of your nail extension application. So remember, always prep the natural nail properly before applying nail tips for the best results.
| Common Mistakes | Correct Techniques |
|---|---|
| Skipping cuticle pushing | Gently push back the cuticles using a cuticle pusher or an orangewood stick. |
| Over-filing the natural nail | Lightly buff the nail surface to remove shine and roughen the nail plate. |
| Not properly cleansing the nail surface | Use a nail dehydrator or alcohol-based cleanser to cleanse the nail surface. |
| Forgetting to apply a primer | If needed, apply a primer designed for improving adhesion. |
Using Inadequate Nail Glue or Adhesive
When it comes to applying nail tips, using the right glue or adhesive is crucial for a long-lasting and flawless manicure. Unfortunately, many people make the mistake of using inadequate nail glue or adhesive, which can lead to various issues such as lifting, quick chipping, and even nail damage. In this blog post, we will explore why using the proper adhesive is important and how to avoid the common pitfalls associated with inadequate nail glue.
Using the wrong type or quality of nail glue can have a significant impact on the longevity of your nail tips. High-quality nail glues are specially formulated to provide a strong bond, ensuring that your nail tips stay in place for weeks without lifting or popping off. On the other hand, inadequate glues may not bond well, resulting in nails that are prone to lifting and easily coming off. To ensure a secure and durable application, it is essential to invest in a reliable nail glue that is designed for professional use.
In addition to the quality of the adhesive, the proper application technique plays a crucial role in achieving long-lasting results. Before applying the glue, it is important to properly prep the natural nail by removing any oil or debris using a nail dehydrator or primer. This step helps the glue adhere better to the nail surface, ensuring a secure bond. Additionally, make sure to apply the glue evenly and sparingly, as excessive amounts can lead to a messy application and potential damage to the nail.
A common mistake made by many is using too much glue in an attempt to achieve a stronger bond. However, this often results in a bulky and unaesthetic manicure that is difficult to maintain. Instead, opt for a thin and even layer of glue, ensuring that it covers the entire surface of the nail tip without overflowing onto the skin or cuticles. Remember, a little goes a long way when it comes to nail glue!
List of Dos and Don’ts for Using Nail Glue:
- Do: Invest in a high-quality nail glue specifically designed for nail tip application.
- Do: Properly prep the natural nail by removing oils and debris for better adhesion.
- Do: Apply the glue evenly and sparingly, ensuring full coverage without overflow.
- Don’t: Use excessive amounts of glue, as this can lead to a bulky and messy manicure.
- Don’t: Neglect to blend and shape the nail tips properly for a seamless finish.
Comparison of Different Nail Glues:
| Nail Glue | Quality | Bond Strength | Drying Time |
|---|---|---|---|
| Brand A | High | Strong | Quick |
| Brand B | Medium | Medium | Medium |
| Brand C | Low | Weak | Slow |
When it comes to using nail glue or adhesive for applying nail tips, choosing the right product and applying it correctly are key factors in achieving beautiful and long-lasting results. By using a high-quality adhesive and following proper application techniques, you can ensure that your nail tips stay in place and your manicure remains flawless for weeks to come.
Neglecting to Properly Blend and Shape Nail Tips
In the world of nail extensions and nail art, proper blending and shaping of nail tips play a crucial role in achieving flawless and long-lasting manicures. Neglecting this essential step can result in poor nail application, leading to chips, breaks, and an overall unsatisfying nail appearance. In this blog post, we will explore the importance of properly blending and shaping nail tips and the consequences of neglecting this vital aspect of nail enhancement techniques.
When it comes to nail extensions, blending the tip with the natural nail is key to creating a seamless and natural-looking manicure. Proper blending ensures that the transition from the artificial nail tip to the natural nail is smooth, minimizing any visible lines or gaps. To blend the nail tip, gently file the seam area using a 180-grit nail file or a buffing block until the tip seamlessly merges with the natural nail plate. Take care not to remove too much of the natural nail or over-file, as this can cause damage and weaken the overall structure.
Once the blending is complete, it is equally important to shape the nail tips to achieve the desired look. Nail tip shaping allows for customization and enhances the overall appearance of the manicure. Whether you prefer square, round, oval, or stiletto-shaped nails, it is crucial to shape the tips in a consistent and symmetrical manner. Using a nail file, gently shape the tips, following the natural curvature of your nail bed. Take your time and pay attention to detail, as precision in shaping contributes to a polished and professional outcome.
Failure to properly blend and shape nail tips can result in several issues. Firstly, an inadequate blend can cause the nail tip to appear obvious and artificial, taking away from the desired natural look. Visible lines or gaps between the tip and the natural nail can also shorten the lifespan of the manicure, as air and moisture can penetrate these areas, leading to lifting and eventual detachment. Furthermore, neglecting to shape the nail tips can create an uneven and unflattering finish, compromising the overall aesthetic and symmetry of the manicure.
Benefits of Properly Blending and Shaping Nail Tips
Achieving a flawless and professional-looking manicure is the primary benefit of properly blending and shaping nail tips. When done correctly, the nail extensions seamlessly blend with your natural nails, ensuring a smooth and natural appearance. A well-blended and shaped manicure also promotes longevity, as there are no visible lines or gaps for air and moisture to seep in, thus reducing the risk of lifting. Additionally, properly shaped nail tips enhance the overall aesthetic of the manicure, providing a sleek and polished finish that complements your personal style.
In Conclusion
Neglecting to properly blend and shape nail tips can significantly impact the overall quality and longevity of your manicures. Take the time to carefully blend the artificial nail tip with your natural nail and shape them to perfection. By paying attention to these crucial aspects of nail enhancement techniques, you can achieve flawless, long-lasting manicures that will leave you feeling confident and stylish.
Frequently Asked Questions
Question 1: Why is choosing the wrong nail tip size a common mistake?
Choosing the wrong nail tip size can lead to discomfort, poor fitting nails, and a less professional-looking result. It is important to select the right size to ensure a comfortable and secure fit.
Question 2: What problems can arise from improper nail tip application technique?
Improper nail tip application technique can result in lifting, breaks, or premature nail tip loss. It is crucial to follow the correct steps to ensure proper adhesion and longevity of the nail tips.
Question 3: How does not prepping the natural nail properly affect the nail tip application?
Not prepping the natural nail properly can lead to poor adhesion and early lifting of the nail tips. The natural nail should be cleaned, buffed, and dehydrated before applying nail tips for better results.
Question 4: Why is it important to use adequate nail glue or adhesive for applying nail tips?
Using inadequate nail glue or adhesive can result in weak bonding, which can cause nail tips to pop off easily or fail to adhere properly. It is essential to use high-quality nail glue or adhesive designed for nail tip application.
Question 5: What are the consequences of neglecting to properly blend and shape nail tips?
Neglecting to blend and shape nail tips can result in a less natural and polished appearance. Proper blending and shaping help to create a seamless transition between the natural nail and the tip, enhancing the overall look of the manicure.
Question 6: How can choosing the right size nail tips improve the overall nail look?
Choosing the right size nail tips ensures a comfortable fit, allowing individuals to perform daily activities without discomfort. Additionally, correctly sized nail tips provide a more professional and aesthetically pleasing appearance.
Question 7: What are the steps involved in properly prepping the natural nail for nail tip application?
The steps involved in properly prepping the natural nail for nail tip application include cleaning the nail surface, gently buffing the nail to create texture for better adhesion, and removing any traces of moisture or oil from the nail bed.


