Are you looking to step up your nail game and add a little flair to your fingertips? Look no further! In this beginner’s guide to nail art, we will walk you through everything you need to know to get started creating beautiful and unique nail designs. From essential techniques for beginners to exploring different styles and trends, this comprehensive guide has got you covered. We’ll discuss choosing the right tools, mastering the art of stamping, troubleshooting common mistakes, and even tips for maintaining your nail art for the long haul. Whether you’re inspired by nature or interested in experimenting with 3D embellishments, we’ll help you unleash your creativity and take your nail art to the next level. So grab your favorite polish and let’s dive into the world of nail art!
Choosing the Right Nail Art Tools
When it comes to creating beautiful nail art, having the right tools is essential. Whether you’re a professional nail artist or just enjoy doing your own nails at home, choosing the right nail art tools can make all the difference in the outcome of your designs.
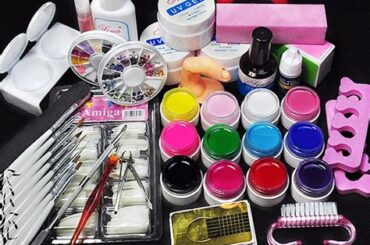
One of the most important tools for nail art is a good set of brushes. Look for brushes that have fine, precise tips for detailed work, as well as larger brushes for covering larger areas of the nail. It’s also important to have a variety of dotting tools for creating different sized dots and patterns.
In addition to brushes, having the right nail polishes is also crucial. Look for polishes that are highly pigmented and have a smooth, even consistency. You’ll also want to have a good top coat and base coat to ensure your designs last and stay protected.
Finally, don’t forget about accessories and embellishments such as rhinestones, glitter, and studs. These can add beautiful and unique details to your nail art designs. With the right tools in hand, you’ll be able to create stunning nail art designs with ease.
Essential Nail Art Techniques for Beginners
When starting out in the world of nail art, it’s important to master some essential techniques that will form the foundation of your skills. These techniques will set you up for success in creating beautiful and eye-catching nail designs.
One essential technique for beginners is the proper preparation of the nails before applying any nail art. This includes trimming, shaping, and buffing the nails to ensure a smooth and even surface for the nail art to adhere to. It’s also important to clean the nails thoroughly and apply a base coat to protect the natural nail and ensure longevity of the nail art.
Another crucial technique is mastering the art of applying nail polish. This involves using smooth and even strokes to avoid streaks and bubbles in the polish. Learning to apply thin layers of polish and allowing each layer to dry completely before applying the next will also result in a flawless finish.
Additionally, beginners should focus on perfecting the technique of using nail art brushes and tools. From fine detailing brushes to dotting tools, having the skills to create precise and intricate designs is essential for achieving professional-looking nail art.
Creating Basic Nail Art Designs
When it comes to creating basic nail art designs, it’s important to start with the right tools and techniques. Begin by gathering essential nail art tools such as nail polish, nail art brushes, dotting tools, and nail tape. These tools will help you to create various designs on your nails, from simple stripes to intricate patterns.
Once you have your tools in place, it’s time to master some essential nail art techniques for beginners. Practice the basics such as applying a base coat, creating an ombre effect, and mastering the art of freehand designs. These foundational techniques will serve as the building blocks for more complex nail art designs in the future.
As you explore different nail art styles, don’t be afraid to experiment with color combinations and patterns. Whether you prefer floral designs, geometric shapes, or abstract art, there are endless possibilities for creating basic nail art designs. Start simple and gradually work your way up to more advanced techniques as you gain confidence and experience.
Remember that creating basic nail art designs is a form of self-expression, so let your creativity shine. Whether you’re creating nail art inspired by nature, exploring current trends, or adding 3D embellishments to your designs, the key is to have fun and enjoy the process of creating nail art.
Exploring Different Nail Art Styles
Nail art has become a popular form of self-expression and creativity, with various styles and techniques to explore. Whether you prefer the classic elegance of French tips or the bold designs of graphic nail art, there are endless possibilities to experiment with.
One of the most popular nail art styles is the minimalist trend, characterized by simple and clean designs. This style often features negative space, muted tones, and understated details, making it a chic and versatile option for any occasion.
On the opposite end of the spectrum, we have the maximalist nail art trend, which embraces bold colors, intricate patterns, and embellishments. This style allows for more creativity and expression, making it a great choice for those who want to make a statement with their nails.
For those who want to incorporate nature into their nail art, there are styles inspired by flora and fauna, such as floral patterns, animal prints, and botanical designs. These styles offer a fresh and vibrant look that can be customized to suit individual preferences.
Mastering Nail Art with Stamping
When it comes to mastering nail art, stamping can be a game-changer. Stamping is a technique that allows you to easily transfer intricate designs onto your nails, creating professional-looking nail art in minutes. The key to mastering nail art with stamping is to start with the right tools. Invest in a good quality stamper, scraper, and metal plates with various designs to ensure successful results.
Once you have your stamping tools ready, the next step is to practice the technique. Start by applying a base coat to your nails and allowing it to dry completely. Then, apply a color of your choice as a background for the stamped design. Using the stamper, transfer the design from the metal plate onto your nail with a rolling motion. It may take a few tries to get the hang of it, but with patience and practice, you will soon be able to create flawless stamped nail art.
Another tip for mastering nail art with stamping is to experiment with different color combinations and designs. Stamping opens up a world of possibilities, allowing you to create intricate patterns, floral designs, geometric shapes, and more. Don’t be afraid to mix and match colors and patterns to create unique and eye-catching nail art.
Lastly, to master nail art with stamping, it’s important to finish off with a top coat to seal and protect your design. This will also help your stamped nail art last longer without chipping or fading. With consistent practice and attention to detail, you can become a pro at stamping and elevate your nail art game to the next level.
Adding Depth to Nail Art with 3D Embellishments
When it comes to nail art, adding depth with 3D embellishments can take your designs to the next level. Whether you’re a beginner or a seasoned nail artist, incorporating 3D elements into your nail art can create eye-catching and unique looks.
One essential nail art technique for adding 3D embellishments is using a clear builder gel or acrylic powder to create a base for the embellishments. This base provides a sturdy foundation for the 3D elements and ensures they stay in place for longer-lasting nail art.
Exploring different nail art styles with 3D embellishments can open up a world of creativity. From floral designs to geometric shapes, the possibilities are endless when it comes to enhancing your nail art with 3D elements. Experiment with different textures, shapes, and sizes to create visually stunning nail art.
Mastering nail art with stamping techniques can also complement 3D embellishments. By combining stamped designs with 3D elements, you can achieve intricate and detailed nail art that adds depth and dimension to your nails.
Troubleshooting Common Nail Art Mistakes
One of the most frustrating things about doing your own nail art is when things don’t turn out as planned. Whether it’s smudged polish, chipped nails, or uneven designs, there are a number of common mistakes that can occur. Fortunately, many of these issues can be easily troubleshooted with a few simple tips and tricks.
One common mistake that many people make when doing nail art is not allowing enough time for each layer of polish to dry. This can lead to smudging and smearing, ruining all of your hard work. To avoid this, be sure to wait at least a few minutes between each layer, and use a quick-dry top coat to speed up the process.
Another common mistake is not properly prepping the nails before starting the design. Failing to remove any old polish, oil, or residue from the nails can lead to peeling and chipping. Make sure to thoroughly clean and dry your nails before beginning any nail art project.
Additionally, many people struggle with achieving smooth, even lines and shapes when using nail art tools. Practice makes perfect, so don’t be discouraged if your first few attempts aren’t flawless. You can also use tape or stencils to help create clean lines and geometric shapes.
Nail Art Maintenance and Longevity Tips
When it comes to maintaining your nail art and making it last longer, there are a few tips and tricks that can help you keep your nails looking fresh and vibrant. One of the most important things you can do is to make sure your nails are properly hydrated. Just like your skin, your nails need moisture to stay healthy and strong. Using a good quality cuticle oil or hand cream can help keep your nails hydrated and prevent them from drying out and becoming brittle.
Another important aspect of maintaining your nail art is to protect it from damage. This can be achieved by using a top coat to seal in the design and protect it from chipping and fading. A high-quality top coat can also add an extra layer of strength to your nails, helping to prevent them from breaking or peeling.
It’s also essential to be mindful of how you use your hands to prevent damage to your nail art. Try to avoid using your nails as tools, and use caution when engaging in activities that could potentially damage your nails. Being mindful of these simple actions can go a long way in preserving the longevity of your nail art.
Lastly, regular maintenance is key to keeping your nail art looking its best. This includes regular touch-ups, cleaning under your nails, and keeping your hands and nails well-groomed. By following these maintenance and longevity tips, you can ensure that your nail art stays looking beautiful for as long as possible.
Creating Nail Art Inspired by Nature
When it comes to creating stunning nail art designs, taking inspiration from nature can result in some truly beautiful and unique looks. From delicate floral patterns to bold animal prints, the natural world offers a wide range of inspiration for your next nail art project.
One technique for creating nail art inspired by nature is to use a variety of earthy tones, such as greens, browns, and blues, to mimic the colors found in the great outdoors. You can also incorporate images of leaves, flowers, or other natural elements into your designs to bring a touch of the natural world to your fingertips.
In addition to using earthy colors and natural imagery, you can also draw inspiration from the textures and patterns found in nature. For example, you can create a marbled nail art design that mimics the look of a stone or a polished agate. Or, you could use a sponge to create a textured, gradient effect that resembles a sunset over the ocean.
By drawing inspiration from the natural world, you can create nail art designs that are both beautiful and meaningful. Whether you’re a fan of delicate floral patterns or bold animal prints, there are endless opportunities to let your creativity bloom when creating nail art inspired by nature.
Exploring Nail Art Trends and Color Combinations
When it comes to nail art, staying up to date with the latest trends and color combinations is essential for keeping your looks fresh and exciting. Nail art trends are constantly changing, and there are always new color combinations to explore and experiment with.
One trend that has been gaining popularity in recent years is the use of negative space in nail art designs. This technique involves leaving parts of the nail bare, creating an interesting and modern look. Another trend to explore is the use of metallic and holographic nail polishes, which can add a futuristic and eye-catching element to your designs. Additionally, gradient nails, neon colors, and abstract patterns are also popular trends to consider when exploring nail art.
When it comes to color combinations, there are endless possibilities to explore. From classic combinations like black and white or navy and gold, to more bold and unexpected pairings like coral and turquoise or lavender and silver, the options are truly limitless. It’s important to consider the season, your personal style, and the overall look you want to achieve when choosing color combinations for your nail art designs.
Exploring nail art trends and color combinations is all about creativity and experimentation. Don’t be afraid to try new trends and color combinations, and remember that the beauty of nail art is that it can always be changed and updated to reflect your current style and preferences.


