Learn how to repair damaged nails with our step-by-step guide, from identifying the damage to applying protective strengthener and sealing with a top coat.
Identifying the Nail Damage
Identifying the Nail Damage
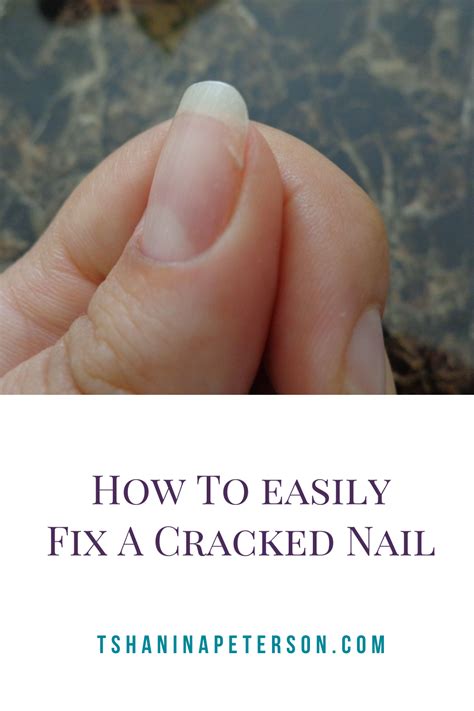
When you notice a broken nail, it’s important to first assess the extent of the damage. Examine the nail closely to determine if it is a minor chip or a significant break. Look for any signs of peeling, splitting, or cracking. Pay attention to any pain or discomfort as well, as this could indicate a more serious injury to the nail bed. Identifying the nail damage is crucial in determining the best course of action for repairing it.
Additionally, consider the location of the break. Is it near the tip of the nail, or closer to the cuticle? This will impact how you approach the repair process. A break near the tip may require a different method of repair than one closer to the cuticle. Take note of any jagged edges or roughness, as these can also affect the repair technique you choose.
Once you have identified the nail damage, you can move on to gathering the necessary supplies for fixing the broken nail. Properly assessing the damage ensures that you can tailor your repair process to effectively address the specific issue at hand.
Gathering the Necessary Supplies
Before you start fixing your broken nail, it’s important to gather all the necessary supplies. First and foremost, you will need a clean cotton pad or ball to remove any existing nail polish. Next, you’ll need a gentle nail polish remover to ensure your nail is free of any leftover polish. Additionally, you will need a pair of nail clippers or a nail file to trim and shape the broken nail. It’s also important to have a nail glue on hand to effectively repair the nail. Lastly, you will need a nail buffer to smooth the repaired nail and prepare it for a fresh coat of nail polish.
Other supplies that may be helpful include a cuticle oil or cream to nourish the surrounding skin, a nail strengthener to protect the nail from further damage, and a top coat for a long-lasting finish. It’s important to have all these supplies within reach before you begin the repair process to ensure a smooth and successful outcome.
By gathering all the necessary supplies upfront, you can streamline the process of fixing your broken nail and avoid any unnecessary interruptions. With the right tools at your disposal, you can confidently approach the repair with precision and care, ultimately achieving a professional-looking result right at home.
Trimming the Broken Nail
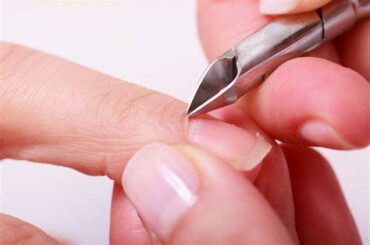
Having a broken nail can be a major inconvenience, but with the right tools and techniques, you can fix it at home without having to visit a salon. Trimming the broken nail is the first step in the process of nail repair. To do this, you will need a pair of sharp nail clippers or scissors specifically designed for trimming nails. Start by carefully trimming the broken edge of the nail to remove any jagged or uneven parts. Be sure to trim the nail as close to the break as possible without causing any further damage. Once the nail is trimmed, you can proceed with the next steps to restore its strength and appearance.
Before trimming the nail, it’s important to ensure that you have thoroughly cleaned and dried your hands. This will help prevent any infections or complications that could arise from working with a broken nail. Additionally, if the break is particularly deep or painful, it’s best to seek professional advice from a nail technician or healthcare provider. Remember to always prioritize your health and safety when performing any DIY nail treatments.
After trimming the broken nail, you can proceed with the subsequent steps of the nail repair process, such as filing the nail smooth, applying nail glue, and adding a protective nail strengthener. By following these steps carefully, you can effectively mend a broken nail and prevent further damage. With time and proper care, your nail will regain its strength and appearance, allowing you to enjoy beautifully manicured hands once again.
Filing the Nail Smooth
After trimming the broken nail, the next step in fixing a broken nail at home is to file the nail smooth. Using a gentle nail file, carefully file the edges of the nail to remove any rough or jagged edges. It’s important to use a light touch and file in one direction to avoid further damage to the nail. Take your time and gently file the nail until it is smooth and the edges are even.
Pay close attention to the shape of the nail as you file to ensure that it remains symmetrical and natural-looking. You may need to use a finer grit nail file to achieve a smooth finish, especially if the nail is prone to splitting or peeling. Be patient and continue filing until the nail is completely smooth to the touch.
Once you have filed the nail smooth, it’s important to gently buff the surface of the nail to remove any remaining roughness. This will help to ensure that the nail is completely smooth and improve the adhesion of any nail glue or repair kit that you may be using to fix the broken nail. Be cautious not to over-buff the nail, as this can weaken the nail and make it more prone to damage.
Applying Nail Glue
How to Fix a Broken Nail at Home
When a nail breaks, it can be tempting to want to remove the entire nail and start over. However, with the right tools and techniques, you can easily repair the broken nail at home. One of the key steps in this process is applying nail glue to securely bond the broken pieces back together.
First, gather all the necessary supplies including nail glue, a nail file, and a nail buffer. Once you have all the supplies ready, trim the broken nail to remove any rough edges. Then, carefully file the nail smooth to ensure a clean surface for the glue to adhere to.
Next, it’s time to apply the nail glue. Using a small amount of glue, carefully apply it to the broken nail, making sure to press the pieces firmly together. Hold the nail in place for a few seconds to allow the glue to set. Once the glue has dried, you can use a nail buffer to smooth out any remaining rough edges for a seamless finish.
Using a Nail Repair Kit
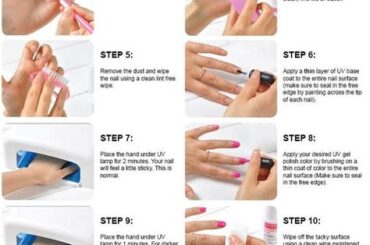
When you find yourself dealing with a broken nail, it’s important to act quickly to prevent further damage and discomfort. One of the most effective ways to repair a broken nail is by using a nail repair kit. These kits typically contain all the necessary tools and materials to fix a broken nail at home, making the process quick and convenient.
First, start by carefully cleaning the affected nail and ensuring that it is dry and free from any dirt or debris. Then, carefully follow the instructions included in the nail repair kit to apply the adhesive or resin to the broken nail. Use the tools provided in the kit to carefully position and hold the broken nail together until the adhesive sets, ensuring a secure and long-lasting repair.
Once the nail repair kit has been used to fix the broken nail, it’s important to follow any additional steps or recommendations provided by the manufacturer. This may include applying a sealant or top coat to protect the repaired nail and prevent any further damage. By using a nail repair kit, you can quickly and effectively mend a broken nail in the comfort of your own home, saving both time and money compared to a trip to the salon.
Adding a Protective Nail Strengthener
When it comes to maintaining the health and strength of our nails, it’s important to take preventative measures to avoid breakage and damage. One effective way to protect and strengthen our nails is by adding a protective nail strengthener to our nail care routine. This product is designed to provide an extra layer of protection to the nails, preventing them from becoming weak and brittle.
Before applying the protective nail strengthener, it’s crucial to ensure that the nails are clean and free from any polish or oils. Using a gentle nail polish remover, thoroughly clean the nails to create a clean surface for the strengthener to adhere to. Once the nails are prepped and ready, carefully apply a thin layer of the protective nail strengthener to each nail, ensuring full coverage and even application.
Allow the protective nail strengthener to dry fully before applying any additional nail polish or treatments. By incorporating this step into your regular nail care routine, you can effectively strengthen and protect your nails, ultimately reducing the likelihood of future breakage and damage.
Applying a Base Coat
When repairing a broken nail at home, applying a base coat is an essential step in the process. Before applying any nail repair products, it is important to ensure that the nail is clean and free of any oils or lotions. This will allow the base coat to adhere to the nail surface properly, providing a strong foundation for the repair.
Using a base coat not only helps to strengthen the nail, but it also provides a smooth surface for the subsequent layers of nail repair products. This extra layer of protection can help prevent future breakage and keep the nail looking polished and healthy.
When applying the base coat, be sure to cover the entire nail surface and allow it to fully dry before moving on to the next steps in the repair process. This will ensure that the base coat effectively bonds to the nail, providing a solid base for the rest of the repair products.
Sealing with a Top Coat
Sealing with a top coat is the final step in fixing a broken nail at home. Once you have applied the base coat and allowed it to dry, it’s time to seal the nail with a top coat. This will not only provide a glossy finish to your nail, but also add an extra layer of protection to the repair.
When applying the top coat, make sure to cover the entire nail surface and extend the coat slightly over the tip of the nail. This will help prevent chipping and peeling, ensuring that your repair job lasts as long as possible. Allow the top coat to dry completely before using your hands for any tasks to avoid smudging or ruining the finish.
For best results, consider reapplying the top coat every few days to maintain the strength and integrity of the repair. By sealing with a top coat, you can ensure that your broken nail looks good as new and remains protected from everyday wear and tear.
Frequently Asked Questions
What are some common causes of broken nails?
Common causes of broken nails include trauma, using nails as tools, and dry, brittle nails.
How can I fix a broken nail at home?
You can trim the nail, file the edges, and apply a nail repair kit or clear nail polish to temporarily fix a broken nail at home.
Is it better to trim or repair a broken nail?
It’s generally better to trim a broken nail if it’s severely damaged, but if it’s a minor break, you can try to repair it with a nail repair kit.
How can I prevent my nails from breaking?
To prevent nails from breaking, keep them well moisturized, avoid using them as tools, and consider wearing gloves for activities that may cause trauma to the nails.
Should I see a professional for a broken nail?
If the broken nail is causing you pain or if the nail is severely damaged, it’s best to see a professional for proper treatment.
What are some home remedies for strengthening nails and preventing breakage?
Home remedies for strengthening nails include applying vitamin E oil, massaging with coconut oil, and using a nail hardener.
How long does it take for a broken nail to grow back?
Nails typically grow back at a rate of about 3mm per month, so it may take a few months for a broken nail to fully grow back, depending on the severity of the break.


