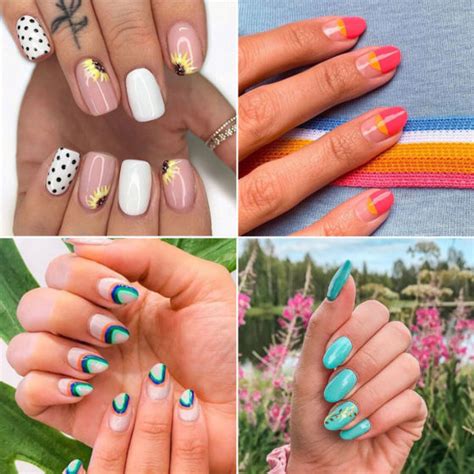
Are you looking to level up your nail game with some easy and trendy DIY designs? Whether you’re a nail art newbie or a seasoned pro, we’ve got you covered with a range of ideas and tips to help you achieve the perfect manicure at home. In this blog post, we’ll cover everything from the essential tools and materials you need to get started to step-by-step tutorials for beginner-friendly designs. We’ll also explore how to choose the perfect nail shape for your hands, as well as seasonal and minimalist nail art ideas that are both sophisticated and effortless. Plus, we’ll delve into techniques like ombre nails, floral designs, geometric patterns, negative space art, and nail stamping to elevate your nail design game. Get ready to unleash your creativity and have some fun with your nails!
Nail Art Basics: Essential Tools and Materials
When it comes to creating stunning nail art, having the right tools and materials is essential. From simple designs to intricate patterns, having the right supplies can make all the difference in achieving the perfect look.
One essential tool for nail art is a set of high-quality brushes. Different brush sizes and shapes can help you create a variety of designs, from delicate lines to bold strokes. Investing in a good set of brushes can elevate your nail art game and allow for more creativity.
Another important material for nail art is a reliable base coat and top coat. These products not only help your design last longer, but they also provide a smooth surface for creating your nail art. A good quality base coat can prevent staining and help your nail polish adhere better, while a top coat can add shine and protection.
In addition to brushes and base/top coats, having a variety of nail polishes in different colors and finishes is essential for creating beautiful nail art. Whether you prefer classic shades or colorful neons, having a diverse polish collection can inspire creativity and allow for endless design possibilities.
Beginner-Friendly Nail Designs: Step-by-Step Tutorials
Are you new to the world of nail art and looking for some easy designs to get started? Look no further! We have put together a collection of beginner-friendly nail designs with step-by-step tutorials to help you create stunning looks at home. Whether you’re into minimalistic designs or bold patterns, there’s something for everyone.
First up, let’s talk about the classic French manicure. This timeless look is perfect for beginners as it’s simple yet chic. Begin by applying a sheer pink or nude base color and then use white polish to create a clean, straight line across the tips of your nails. You can use a small piece of tape to help you achieve the perfect line if needed.
If you’re feeling a bit more adventurous, try your hand at creating a colorful polka dot design. All you need is a few different shades of nail polish and a dotting tool or a bobby pin. After applying a base color, use the dotting tool to create evenly spaced dots in a contrasting color. This design is fun, playful, and perfect for beginners to experiment with.
For those who prefer a more intricate design, consider trying out a simple floral nail art. Start by applying a light base color and then use a thin nail art brush to create delicate petals and leaves. You can also use nail stickers or decals for an easier alternative. This design may look complex, but with a bit of practice, you’ll be able to create beautiful floral patterns on your nails.
Trending Nail Shapes: How to Choose the Perfect One
When it comes to choosing the perfect nail shape, it’s important to consider your natural nail bed and your personal style. The square shape is a classic choice that suits many nail types and looks great with bold colors and designs. If you have narrow nail beds, the oval shape can help to elongate your fingers and create a more feminine look. For those with short nails, the round shape can soften your overall look and make your nails appear longer. If you want a more daring and edgy look, the stiletto shape may be the perfect choice for you.
It’s also important to consider the practicality of different nail shapes. For instance, the almond shape is a versatile choice that works well for both short and long nails, and it’s less likely to snag or break compared to sharper shapes like stiletto. On the other hand, the coffin shape is a trendy and bold choice, but may require longer nails to achieve the desired effect.
Ultimately, the perfect nail shape for you will depend on your personal style, nail length, and lifestyle. Experiment with different shapes and don’t be afraid to step out of your comfort zone to find the perfect nail shape that makes you feel confident and stylish.
Remember, these are just guidelines and there are no strict rules when it comes to nail shapes. The most important thing is to choose a shape that makes you feel fabulous and complements your overall look.
Seasonal Nail Designs: Embrace the Festive Vibes
As the seasons change, so do our nail designs. Embracing the festive vibes of each season is a fun way to express your creativity and get into the spirit of the holidays. Whether it’s bright and colorful summer nails or cozy and warm winter designs, seasonal nail art allows you to play with different colors, patterns, and themes.
When creating seasonal nail designs, it’s essential to have the right tools and materials on hand. This may include a variety of nail polishes in seasonal shades, nail art brushes, decals, and embellishments. It’s also important to have a good quality top coat to seal and protect your designs.
Step-by-step tutorials for beginner-friendly seasonal nail designs can help you achieve professional-looking results at home. Whether you’re celebrating Halloween, Thanksgiving, Christmas, or any other holiday or special occasion, there are endless possibilities for festive nail art that will complement your overall look.
Embracing the festive vibes through your nails is a great way to add a pop of color and personality to your style. From elegant seasonal patterns to fun and whimsical designs, there’s a seasonal nail art look for everyone to enjoy.
Minimalist Nail Art: Sophisticated and Effortless
Minimalist nail art is all about simplicity and sophistication. It’s a versatile style that can be achieved with minimal effort, making it perfect for those who want a chic and understated look. With just a few essential tools and materials, you can create beautiful and effortless designs that are perfect for any occasion.
When it comes to minimalist nail art, neutral shades are the go-to colors. Think soft pinks, muted greys, and clean whites. These subtle hues create a clean and sophisticated look that complements any outfit. To add a subtle pop of color, you can also opt for pastel shades that give a feminine touch to your minimalist nail designs.
One of the key elements of minimalist nail art is negative space. This technique involves leaving parts of the nail bare to create a modern and clean aesthetic. Whether it’s a simple stripe or a geometric shape, negative space allows for a minimalistic yet impactful look. You can also add delicate linework or geometric patterns to create interest and texture in your minimalist nail designs.
Ultimately, minimalist nail art is about embracing simplicity and elegance. By using basic tools such as a dotting tool, striper brush, and top coat, you can achieve stunning and effortless designs that make a bold statement in a subtle way. Whether you’re a nail art novice or a minimalist enthusiast, this trend is perfect for those who want to elevate their nail game with sophistication and ease.
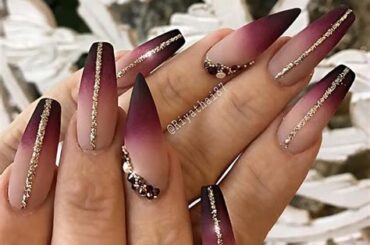
Ombre Nails: Blend Colors for a Gradient Effect
Are you looking for a trendy and eye-catching nail design? Ombre nails may be just what you need! This popular nail art technique involves blending two or more colors to create a seamless gradient effect. Whether you prefer soft pastels, bold neons, or classic neutrals, ombre nails can be customized to suit your personal style.
To create ombre nails, you will need a few essential tools and materials. Start by gathering nail polishes in the colors of your choice, a makeup sponge, nail polish remover, and a top coat. Additionally, having a small brush or makeup applicator on hand can help refine the ombre effect.
Begin by applying a base coat to your nails to protect them and ensure a smooth application. Once the base coat has dried, select your desired nail polish colors for the ombre effect. Apply the lightest color as the base coat and allow it to dry completely. Then, apply the chosen colors to the edge of the makeup sponge, slightly overlapping them to blend the colors together.
Gently dab the sponge onto your nails, focusing on the area where you want the ombre effect to appear. Repeat this process as needed to achieve the desired intensity of color. Once the polish has dried, clean up any excess around your nails using a brush or cotton swab dipped in nail polish remover. Finally, finish off your ombre nails with a layer of top coat to seal in the design and add a glossy finish.
Floral Nail Designs: Bring a Touch of Nature
When it comes to nail art, floral designs are a timeless and versatile choice that can add a touch of nature and beauty to your fingertips. Whether you’re a beginner or a seasoned nail enthusiast, incorporating floral patterns into your nail designs can bring a fresh and vibrant element to your overall look.
One of the essential tools for creating stunning floral nail designs is a set of detailing brushes. These brushes allow for precision and control when painting intricate floral motifs, from delicate petals to intricate leaves and vines. Additionally, having a collection of high-quality nail polishes in an array of colors is crucial for achieving vibrant and realistic floral designs.
When it comes to choosing the perfect floral nail design, consider opting for step-by-step tutorials that cater to beginners. These tutorials often provide easy-to-follow instructions on how to create various floral patterns, such as blooming roses, dainty daisies, and exotic orchids. By following these tutorials, you can elevate your nail art skills and create professional-looking floral designs at home.
Floral nail designs are not only suitable for everyday wear but can also be customized to embrace seasonal vibes. From blooming spring flowers to rich autumn blooms, floral patterns can be adapted to suit the time of year and bring a sense of nature’s beauty to your fingertips. Whether you prefer minimalist floral accents or bold, statement-making designs, floral nail art can be tailored to reflect your individual style and personality.
Geometric Nail Art: Bold Shapes and Lines
Geometric nail art is a bold and modern way to express your creativity through your manicure. By incorporating bold shapes and lines, you can create eye-catching nail designs that are sure to make a statement. Whether you prefer minimalist geometric patterns or intricate and detailed designs, there are endless possibilities to explore.
When it comes to creating geometric nail art, the essential tools and materials you will need include nail polish in various colors, nail art brushes, striping tape, and a steady hand. These tools will help you achieve clean lines and precise shapes, ensuring that your geometric nail designs look professional and polished.
One beginner-friendly geometric nail design is the classic striping tape manicure. By using striping tape to create straight lines and geometric patterns, you can achieve a clean and precise look without having to freehand the design. This is a great technique for those who are new to nail art and want to experiment with geometric shapes.
For those who are more experienced with nail art, experimenting with geometric negative space designs can take your manicure to the next level. By strategically leaving parts of the nail bare, you can create geometric patterns that stand out against your natural nail color, allowing for a modern and artsy look.
Negative Space Nails: Embrace the Bare Beauty
In the world of nail art, negative space nails have been making a major comeback. This minimalist nail trend embraces the beauty of bare nails, using simple and strategic designs to create stunning looks. Instead of covering the entire nail with polish, negative space nails leave parts of the nail bare, creating a modern and sophisticated aesthetic.
One of the best things about negative space nails is that they are incredibly versatile. Whether you prefer a simple, chic look or something more intricate and eye-catching, there are endless possibilities for incorporating negative space into your nail art.
For a subtle and understated look, you can opt for a minimalist design that features delicate lines or geometric shapes on the bare nail. This creates a sophisticated and effortless look that is perfect for any occasion. On the other hand, if you want to make a bold statement, you can experiment with more intricate designs that incorporate negative space in creative and unexpected ways.
Embracing negative space in your nail art allows you to showcase the natural beauty of your nails while adding a touch of modern flair. Whether you’re a nail art novice or a seasoned pro, negative space nails are a trend that anyone can try and make their own.
Nail Stamping: Elevate Your Nail Design Game
Nail stamping is a fun and creative way to take your nail designs to the next level. By using special nail stamping plates and stamping polish, you can easily transfer intricate designs onto your nails with minimal effort. Whether you’re a beginner or a nail art enthusiast, nail stamping is a technique that anyone can master.
One of the best things about nail stamping is the wide variety of designs you can create. From delicate floral patterns to bold geometric shapes, there are endless options to choose from. With a single stamping plate, you can create multiple unique designs, making it a cost-effective and time-saving technique.
To get started with nail stamping, you’ll need a few essential tools, including a nail stamper, scraper, and of course, some nail stamping plates. There are also countless online tutorials and step-by-step guides available to help you master the technique and create stunning nail designs.
Whether you’re looking to add a pop of color to your overall look or want to experiment with intricate designs, nail stamping is a versatile technique that allows you to express your creativity and elevate your nail design game.


