Easy Nail Art Techniques for Beginners
When it comes to nail art, it can seem intimidating to beginners. With so many intricate designs and techniques out there, where does one even begin? Luckily, there are plenty of easy nail art techniques that even novices can try their hand at. Whether you’re a nail art enthusiast looking to expand your skills or a beginner looking for a place to start, these simple techniques are perfect for creating stunning nail art designs.
Listed below are some easy nail art techniques that beginners can try:
- Dotting: One of the simplest nail art techniques is dotting. All you need is a dotting tool or toothpick and some nail polish. By creating dots of different sizes, you can create various patterns and designs on your nails. Start with a solid base color and then use a contrasting color for the dots.
- Striping: For a sleek and modern look, try striping. This technique involves using thin strips of tape or a striping brush to create clean, straight lines on the nails. You can create vertical, horizontal, or diagonal stripes for a fun and unique design.
- Stamping: Nail stamping is a great way to achieve intricate designs without the need for steady hands. You’ll need a nail stamping plate, a stamp, and some stamping polish. Simply apply the polish to the design on the plate, scrape off the excess, and then transfer the design onto your nails using the stamp. It’s a quick and easy way to create impressive nail art.
These easy nail art techniques are just the beginning. Once you’ve mastered these basics, you can experiment with more advanced techniques such as gradients, water marbling, and freehand designs. The key is to practice and have fun with it. Nail art is a creative outlet that allows you to express your personal style and add a pop of color to your everyday look. So grab your nail polish collection and get ready to unleash your inner artist!
Minimalist Nail Designs for a Chic Look
When it comes to nail art, sometimes less is more. Minimalist nail designs have gained popularity in recent years for their sleek and understated look. Whether you prefer neutral shades or bold colors, minimalist nail designs can give you a chic and sophisticated look that is perfect for any occasion. In this blog post, we will explore some easy and stunning minimalist nail art techniques that even beginners can try.
One simple yet elegant minimalist nail design is the classic French manicure. This timeless look features a pale pink or nude base with white tips. To achieve this look, start by applying a base coat to protect your nails. Then, carefully paint the tips of your nails with white nail polish, using a steady hand or nail guides for guidance. Let the polish dry, and finish with a clear top coat for a glossy finish.
If you want to add a modern twist to your minimalist nail design, try negative space nail art. This technique involves leaving certain parts of your nails bare or unpainted, creating a unique and edgy look. You can experiment with different shapes and patterns, such as geometric lines, triangles, or even cut-out designs. Use striping tape or nail stencils to easily create clean and precise lines, and remember to seal your design with a top coat to make it last longer.
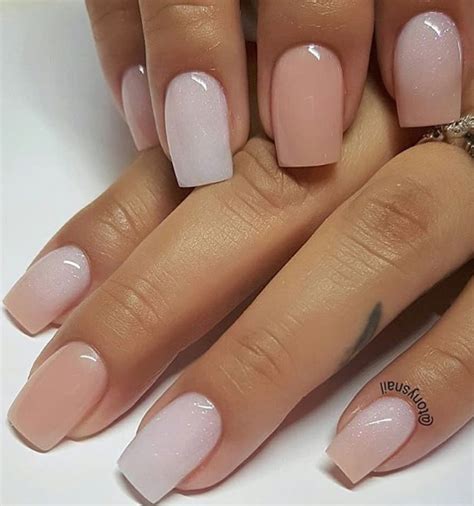
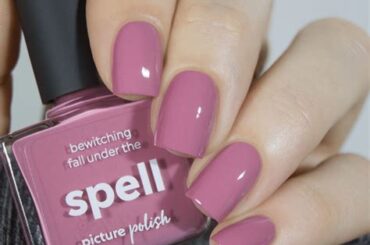
Another minimalist nail design that is perfect for a chic and trendy look is a simple one-color manicure. Choose a single color that matches your outfit or mood, and apply it evenly across your nails. Opt for muted pastel shades for a soft and feminine look, or go for bold and vibrant hues for a statement-making manicure. Finish off with a high-shine top coat to give your nails a polished finish.
- Classic French manicure
- Negative space nail art
- One-color minimalist manicure
| Technique | Description |
|---|---|
| Classic French manicure | A timeless look with a pale pink or nude base and white tips |
| Negative space nail art | Leaving parts of the nails bare or unpainted for an edgy look |
| One-color minimalist manicure | A simple and sleek look using a single color across all nails |
Geometric Patterns to Step up Your Nail Game
When it comes to nail art, there are endless possibilities to express your creativity. Geometric patterns have gained significant popularity in recent years, offering a modern and stylish look to your nails. Whether you’re a beginner or a nail art enthusiast, incorporating geometric patterns into your manicure can instantly elevate your nail game. In this blog post, we will explore some easy and stunning geometric nail art techniques that will help you step up your nail game.
One popular geometric pattern is the classic chevron design. This pattern adds a touch of sophistication to your nails. Start by applying a base coat and let it dry completely. Then, using striping tape, create a chevron shape on your nails. Apply a contrasting color over the exposed part of your nails, ensuring a smooth and even application. Carefully remove the striping tape while the polish is still wet to reveal the sharp and clean chevron pattern. Finish off with a glossy top coat to seal in your design and add shine.
Another geometric pattern that is both eye-catching and easy to achieve is the triangular nail art. Begin by applying a base color of your choice and let it dry. Then, using a thin nail art brush or a striping brush, create a triangular shape on your nail, starting from the base and extending towards the tip. Fill in the triangular shape with a different color, creating a trendy and modern geometric design. Seal in your design with a top coat for a long-lasting and polished finish.
List of materials needed:
- Base coat
- Striping tape
- Contrasting nail polish
- Glossy top coat
- Thin nail art brush or striping brush
- Various nail polish colors
Table displaying different geometric nail art techniques:
| Geometric Pattern | Description |
|---|---|
| Chevron | A classic V-shaped pattern that adds sophistication to your nails |
| Triangles | Modern and trendy geometric shapes that can be easily created |
Geometric patterns offer a stylish and unique way to step up your nail game. From chevron designs to triangular nail art, the possibilities are endless. Experiment with different colors and patterns to create your own geometric masterpieces. Don’t be afraid to mix and match geometric shapes to create a truly personalized nail art look. So go ahead, grab your nail polishes and get creative with geometric patterns that will surely make your nails stand out!
Ombre and Gradient Nail Designs for a Beautiful Fade
Ombre and gradient nail designs have been trending in the world of nail art for their beautiful and seamless fade effect. These techniques allow for a smooth transition of colors, creating a stunning visual impact on your nails. Whether you’re a beginner or an experienced nail artist, ombre and gradient designs are relatively easy to achieve and can be customized to suit your individual style.
One popular technique for creating a gradient effect is the sponge method. To start, gather two or more nail polish colors that complement each other. Begin by applying a base coat to protect your nails and allow it to dry. Then, paint each color horizontally on a makeup sponge, slightly overlapping them. Gently press the sponge onto your nails, rolling it back and forth to transfer the colors. Repeat this step until you achieve the desired intensity of the gradient.
Another technique for creating a stunning ombre effect is the brush method. Start by applying a base coat and allowing it to dry. Then, choose two or more nail polish colors that blend well together. On a clean nail art brush, paint a thin strip of each color next to each other. With the brush, gently stroke from the cuticle to the tip of your nail, blending the colors together. This technique requires a bit more precision, but the result is a professional-looking ombre gradient.
Once you have mastered the basics of ombre and gradient nail designs, you can experiment with different color combinations and patterns. For a subtle and elegant look, opt for shades within the same color family, such as different shades of pink or blue. If you’re feeling bold and adventurous, consider incorporating multiple colors for a vibrant and eye-catching ombre effect.
To enhance the visual appeal of your ombre and gradient nails, you can also add glitter, foil, or metallic accents. Apply a thin coat of glitter polish or use a nail art brush to create intricate designs with foil or metallic nail polish on the fading part of your ombre nails. This will add depth and dimension to your gradient design, making it stand out even more.
In conclusion, ombre and gradient nail designs offer a beautiful fade effect that can elevate your manicure to the next level. With various techniques such as the sponge and brush methods, you can effortlessly create stunning gradient nails. Don’t be afraid to play with different color combinations and add extra flair with glitter, foil, or metallic accents. So go ahead, unleash your creativity, and let your nails make a statement with these mesmerizing ombre and gradient designs.
Floral Nail Art Ideas for a Feminine Touch
When it comes to nail art, floral designs are a classic choice for adding a feminine touch to your look. Whether you are a beginner or an experienced nail artist, there are countless floral nail art ideas that you can try. From delicate petals to vibrant blooms, floral nail art allows you to showcase your creativity and express your personal style. In this blog post, we will explore some stunning floral nail art techniques that are perfect for adding a touch of elegance to your nails.
1. Watercolor Floral Nails: Create a soft and dreamy look by re-creating watercolor paintings on your nails. Start by applying a light base color and allow it to dry completely. Then, use a thin nail art brush and different shades of pastel nail polish to paint delicate floral patterns on your nails. Blend the colors together to achieve a watercolor effect. Finish off with a top coat to seal and protect your masterpiece.
2. Pressed Flower Nail Design: Take your floral nail art to the next level by incorporating real pressed flowers into your design. Begin by applying a clear base coat on your nails. Once dry, apply a light-colored nail polish as the base. Select your favorite flowers and carefully place them onto your nails while the polish is still tacky. Press the flowers gently with a cotton swab or tweezers to ensure they stick. Seal the design with a layer of clear top coat to preserve the flowers and add shine.
3. 3D Floral Embellishments: Add dimension and texture to your floral nail art by using 3D embellishments. Start by applying a base color of your choice and allow it to dry. Then, use a small dotting tool or toothpick to apply a drop of clear nail glue onto your nail. Carefully place tiny 3D flowers or floral decals onto the glue, arranging them in a desired pattern. Press them gently to ensure they adhere properly. Finish off with a generous layer of top coat to secure the embellishments.
Floral nail art allows you to embrace your femininity and showcase your love for nature. Whether you opt for delicate watercolor designs, pressed flower creations, or 3D embellishments, there are endless possibilities to create stunning floral nail art. So, grab your nail polishes, brushes, and floral accessories, and let your nails bloom with beauty and elegance!
Negative Space Nail Designs for a Modern Twist
Negative space nail designs have become a trendy way to add a modern twist to your manicure. By strategically leaving parts of your nails unpainted, you can create unique and artistic designs that are sure to make a statement. Whether you’re a nail art beginner or a seasoned pro, negative space designs are a great way to showcase your creativity and style.
One of the easiest ways to incorporate negative space into your nail design is by using a simple stripe pattern. This can be achieved by painting a thin line down the center of each nail, leaving the sides bare. You can use contrasting colors for a bold look, or go for a more subtle effect with similar shades. The key is to make sure the stripe is clean and precise, so take your time and use a nail art brush for precision.
Another popular negative space design is the “half moon” manicure. This technique involves painting a half-moon shape at the base of each nail, leaving the rest of the nail bare. This design can be done with different colors or even with different finishes, like matte and glossy. To achieve a clean half-moon shape, you can use reinforcement stickers or simply freehand it with a nail art brush.
- Stripe pattern
- Half moon manicure
- Triangles and geometric shapes
- French tip with a twist
For a more geometric look, you can experiment with triangles and other shapes. By painting triangular sections of your nails, you can create a modern and edgy design. You can also combine different shapes and colors for a more intricate look. Just make sure to use tape or nail vinyls to create clean lines and avoid smudging.
| Nail Design | Description |
|---|---|
| French tip with a twist | Instead of painting the entire tip of your nail, leave a small triangle unpainted for a unique twist on the classic french tip manicure. |
| Striped negative space | Create a simple yet stylish look by painting thin stripes down the center of each nail, leaving the sides bare. |
| Geometric patterns | Experiment with triangles, squares, and other geometric shapes to create a modern and edgy nail design. |
Lastly, for those who love a little sparkle, negative space designs can also incorporate glitter, foil, and metallic accents. By combining these elements with the bare parts of your nails, you can create a glamorous and eye-catching look. Whether you choose to use glitter polish, foil wraps, or metallic nail tape, the key is to apply them strategically to highlight the negative space.
Negative space nail designs offer a fresh and modern take on traditional manicures. With endless possibilities for creativity, you can showcase your own unique style while staying on trend. So go ahead and give these designs a try – you’ll be sure to turn heads with your modern twist on nail art!
Statement Nails: Glitter, Foil, and Metallic Accents
When it comes to expressing your personal style, your nails can be a canvas for creativity. Statement nails have become incredibly popular in the world of nail art, allowing individuals to make a bold and eye-catching statement with their manicures. There are various techniques and designs that can be used to achieve statement nails, but some of the most popular ones involve the use of glitter, foil, and metallic accents. These elements add a touch of sparkle and shine to your nails, making them stand out from the crowd.
Glitter:
Glitter is one of the most versatile nail art materials, and it can instantly elevate your manicure to the next level. Whether you prefer a subtle shimmer or a full-on sparkle, there are countless ways to incorporate glitter into your statement nails. One popular technique is to apply a glitter topcoat over a solid-colored base. This creates a dazzling effect that catches the light and adds dimension to your nails. Alternatively, you can create intricate glitter designs by using fine glitter powder and a precision brush. From glitter ombré to glitter accents, the possibilities are endless.
Foil:
If you’re looking for a chic and sophisticated way to amp up your statement nails, foil is the perfect choice. Foil manicures have gained popularity in recent years, and for good reason. The process involves applying a special adhesive onto the nails and then pressing metallic foil onto the adhesive. This creates a stunning metallic finish that is sure to catch everyone’s attention. Foil comes in various colors and patterns, allowing you to customize your manicure to suit your personal style. Whether you prefer a subtle gold foil accent or a bold foil design, you can achieve a luxurious look with ease.
Metallic Accents:
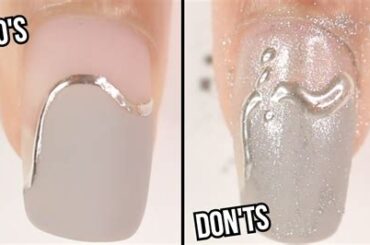
Metallic accents are another fantastic way to make a statement with your nails. From chrome finishes to silver studs, metallic elements can add a touch of edginess and elegance to your manicure. One popular trend is to create negative space designs using metallic tape or stickers. This involves leaving certain areas of the nail bare and applying metallic accents to the exposed areas. The contrast between the natural nail and the shiny metallic accents creates a striking effect that is both modern and stylish.
In conclusion, statement nails are a great way to showcase your personal style and add some pizzazz to your manicure. By incorporating glitter, foil, and metallic accents into your nail art, you can create a look that is bold, eye-catching, and uniquely you. Whether you opt for a glitter ombré, a foil manicure, or metallic accents, your statement nails are sure to make a lasting impression.
Frequently Asked Questions
1. What are some easy nail art techniques for beginners?
Some easy nail art techniques for beginners include minimalist designs, geometric patterns, ombre and gradient designs, floral nail art, negative space designs, and statement nails with glitter, foil, and metallic accents.
2. How can minimalist nail designs create a chic look?
Minimalist nail designs create a chic look by using simple and clean lines, often with neutral colors or a combination of black and white. They are elegant and understated, perfect for adding a touch of sophistication to your nails.
3. How can geometric patterns step up your nail game?
Geometric patterns can step up your nail game by adding a modern and edgy touch to your nails. From triangles and squares to abstract shapes, these designs are eye-catching and can make a bold statement.
4. How can you achieve a beautiful fade with ombre and gradient nail designs?
You can achieve a beautiful fade with ombre and gradient nail designs by blending different shades of the same color or complementary colors seamlessly on your nails. This technique creates a soft and gradient effect, giving your nails a beautiful and mesmerizing look.
5. How can floral nail art ideas add a feminine touch to your nails?
Floral nail art ideas add a feminine touch to your nails by incorporating delicate and intricate flower designs. Whether it’s a single floral accent or an entire bouquet, these designs are romantic and perfect for expressing your femininity.
6. What is unique about negative space nail designs?
Negative space nail designs are unique because they utilize the empty spaces on your nails, creating a modern and minimalist look. By leaving parts of your nails unpainted, these designs play with the contrast between painted and bare areas, resulting in a sophisticated and edgy nail art style.
7. How can statement nails with glitter, foil, and metallic accents make a bold statement?
Statement nails with glitter, foil, and metallic accents make a bold statement by adding eye-catching and glamorous elements to your nails. Whether it’s a full-on glittery nail, foil accents, or metallic details, these designs are attention-grabbing and perfect for a special occasion or to showcase your unique style.

